Friday, October 28, 2011

Spider Games!

As you can tell from my previous post, I used spider rings quite a bit for my 4 year old daughter's spider-themed Halloween party. Luckily I found packs of 100 for sale at Walmart for just $1.89. Each pack included black, orange, green, and purple spiders. Once all the black spiders were used inside for treats and decor, I hid all the brightly colored ones out in the backyard before the party guests arrived. Literally 150 spiders. During the party, I had the children decorate lunch sacks with Halloween stickers and then use them to collect all the spiders they could find. Spider rings were actually really fun to hide because they could wrap around so many things, like the leg of a patio chair or our chain link fence.

Another spider game we played inside was one that I came up with myself, after bouncing some ideas off of my friend and my dad. The day before the party, I taped a huge spider web on my living room floor - the size of the living room! At first I tried white electrical tape but it was too stretchy and didn't stick very well so I ended up using strapping tape, and then a bit of plain scotch tape when I ran out. For party favors, I had bought large inflatable spiders for each guest at the Dollar Tree and had them all ready to go. Only one spider had a red monster sticker on the bottom that I put on before the party, but I didn't tell the kids which one! Everyone stood off of the web and closed their eyes as I scattered the spiders all around the giant web. When I said "Go", they all ran onto the web and placed their hand on a spider. When I counted to 3, they flipped their spider over to see who had the red monster sticker. Whoever had it got to keep a plain spider for themselves, but were out of the game. Then the game continued with one less player and one less spider for each round, until only one child was left!

Pulling up all the tape after the party was fun for Molly and her little brother, Ben (1) so I loved having the clean-up help! I put all the tape into a big ball and now, days later, Ben is still playing with it!

**The friend that helped me come up with my spider game also has a blog! Check it out: www.lifesprinkledwithglitter.blogspot.com!

Halloween Snacks with Spiders!

Every year since my daughter Molly(4) was born, I've had a Halloween Party for her. The first year she was only seven months but I wanted it to be an annual thing so we started out with a "Mummy and Me Party" and made it mostly for the moms. Every year has had a different theme, including "Little Monsters" and "Candy Corn - Yum!" When planning any party, it is so much easier to pull everything together when you have a central theme!

This year's theme was chosen by the hostess herself (Molly!) which was spiders. Just like me, Molly is totally into spooky things and loves Halloween, so I was only a little surprised when she requested such a creepy theme. I was more surprised when she requested a fake spider web right above her bed!!

We had fun decorating the house with fake spider webs and spiders everywhere! My favorite places are in the bathroom where we covered all of the mirrors, and a complete wall in the living room which I used as a backdrop for photos at the party. Mostly I use existing anchors to create the webs, including picture frames, nails and furniture. Whenever I needed a little extra something, though, I just used a clear thumb tack and tried to stick it in an inconspicuous spot or a smaller hole that was already in the wall. Since most packs of fake spider webs don't come with enough spiders, we used black spider rings and I just snipped off the ring part with scissors. Molly did a great job putting on the spiders; for the highest ones she simply tossed them up and they stuck!

As a special spidery treat we made spider cookies! We started with layered chocolate cookies, such as Oreos and twisted them apart. I added extra chocolate frosting on one side, as Molly pressed on four strips of licorice (we used Twizzlers Pull & Peel). When the licorice hangs over each side, it becomes eight spider legs! I replaced the top part of the cookie, then attached two candies, like M&M's, with white frosting for eyes. This was such a fun project to make and delicious to eat!


We also had a second cookie at the party: my mom's famous sugar cookies in the shape of spider webs! She happens to have a spider web cookie cutter... I think between the two of us we literally have at least 250 cookie cutters! She frosted each cookie black so Molly and I could pipe on some spider webs (and other designs, thanks to Molly's creativity) with sparkly frosting I found in the baking aisle at Walmart. The tubes of sparkly frosting didn't last very long - one tube frosted only six cookies - so I'd recommend buying a couple packs. The sparkle was worth the price, though - about $2.80 for a pack of 4.


For a salty snack I served tortilla chips and homemade guacamole. I put the guacamole in a large orange bowl and piped on sour cream in the shape of a large spider web to keep with our theme. To pipe on the sour cream, simply spoon some into a plastic baggie and snip a corner off to act as a pastry bag.


Finally, I served a very simple yet yummy punch which consisted of green Hawaiian Punch mixed with Sprite. I sprinkled some black spider rings in the punch bowl for effect and also had made ice cubes with spider rings inside of them! Making those ice cubes was a very fun and easy project to do with Molly a couple days before the party.

Thursday, October 13, 2011

Spooky FAST meal ideas

I keep having the master plan to make one big, scary meal for dinner one night where everything has a spooky theme. Well, that master plan has yet to fall into place, so in the meantime I decided to do a little hint of spooky whenever I could manage. Isn't that how things usually go, though? For me, at least! LOL I'm always throwing something together at the last minute... and you know what? That's just fine, too.

One night, I think I served sloppy joes ("slop sloppy joes...") and decided to make some instant mashed potatoes to go along with them. Last minute, I remembered something I read in a small Halloween Cookbook from several years ago and I made spooky mashed potato snakes!! I mixed in about eight drops of lime green food coloring (or you could use maybe 6 drops of green and 6 of yellow to get a good shade of green) and spooned my prepared mashed potatoes into a plastic baggie. I snipped the corner with scissors, about 3/4 of an inch, and piped it onto my kids' plates in the shapes of snakes! I made the heads a bit larger and added some cut-up green olives for eyes. If you pull the pimento out of the olives, it's actually like a V shape so it was perfect for a snake's forked tongue! Molly (4) got a big kick out of this meal, but little Ben (1) hesitated to eat it: we joked that he thought it was "real" snake!


Another night I made Mummy Pizzas ~ They were so quick, so easy, and so delicious. I got this recipe from a recent issue of Family Fun Magazine. The actual recipe called for italian bread but I chose a fresh loaf of french bread instead. I cut the loaf into 8 pieces and laid them out on a foil-lined pan, then toasted them for 2 minutes in the oven on low broil. I topped each piece of bread with some pizza sauce (from a jar...) then cut some slices of mozzarella cheese into strips and laid them across each pizza like the strips of cloth on a mummy! For eyes I used some sliced black olives. They look really cool when you overlap a little cheese over them too. Broil your pizzas for about 3 minutes and your Halloween meal is ready.

I was so impressed at the speed of the meal... not only how fast it was to make it but also how quickly it disappeared off my family's plates!! I may not make mummies unless it's October, but I will definitely be adding french bread pizzas to my repertoire of meals.

Easy Outdoor Halloween Decorations

One day while just playing outside, my daughter and I decided to begin decorating outside for Halloween. I didn't have any real decorations with me so we had to improvise. Here's what we came up with!

First of all, anyone who knows me knows I freaking love sidewalk chalk. So naturally we were already outside with chalk and were taking turns drawing Halloween things and having the other person guess what they were. Our driveway was filled with ghosts, witches, Frankensteins, and more. Then I got the idea to draw spooky eyes on the dark bricks of our house. This was easy for Molly (4) to draw herself and they won't wash away in the rain because they're right under the roof!


Next, I grabbed my rake and made a small pile of leaves for Molly and Ben (1) to land in at the foot of their slide. I hurried and grabbed a couple large yellow trash bags and filled those with some leaves (a quick task in my yard because I have a TON of leaves). When they were filled, we used permanent markers to draw faces on them and set them out as decoration.


These decorations were so easy and fun... and now my house is a little more festive outside! My favorite part, though, was pretending with Molly that we were on a walk and saw all these spooky things! We held hands and pretended to scream and run away, only to be scared by the witches and monsters we'd drawn earlier with chalk. What a fun day!

Sunday, October 9, 2011

It's A Great Pumpkin Patch, Charlie Brown!

Saturday we went to pick our own pumpkins at a local pumpkin patch! It was in our plans so when Molly (4) pulled it from our countdown calendar she wasn't surprised... but she was happy! The past several years we've visited the KC Pumpkin Patch in Gardner, KS. It has been very fun, but also very expensive. They boast fifty activities, such as big slides, duck races, mini petting zoo, giant jumping pillow (which is actually really cool), and two different kinds of train rides. Plus apple cider slushies. However, it costs $10 per person... including anyone over age 3, and pumpkins are charged by weight, so we opted for a cheaper version this year.

We got back to the basics of pumpkin picking and chose to visit the Powell Pumpkin Patch in Louisburg, KS. Entry is free and pumpkins are priced by size. None of ours (even our biggest) cost over $5. They offer free hay rides out into the pumpkin patch. It had a very personable feel... your wagon would drop you off in the field then wait to give you all a ride back with your pumpkin(s) of choice. Out in the fields, we set Ben (1) on a pumpkin for a cute photo op, and then he started sitting on all the pumpkins! Needless to say, we got several cute shots on our visit. I love that it wasn't crowded at all!!
Powell Pumpkin Patch also has a corn maze, which costs just $4 per adult; kids 6 and under are free. There was a series of letters and Kansas trivia hidden in the maze for you to find and decode. Our kids were too young for that, but enjoyed taking turns leading the way and Ben just liked picking up and throwing the dirt. Just outside the maze was a great hay playground for kids. They had a hay maze and giant hay piles to climb on, a tunnel to crawl through, and a slide to go down. There is also a big, clean sand box filled with great trucks and diggers.

We all had a great time and I'd highly recommend this pumpkin patch! Keep in mind, however, that they only serve some candy and canned drinks because it's basically a little "pumpkin shack" out in a field! Nothing fancy, but that's part of why we liked it so much!

For more information on either pumpkin patch mentioned in this blog, please visit:
www.kcpumpkinpatch.com
www.powellpumpkinpatch.com

Saturday, October 8, 2011

Easy Halloween Lunch Ideas!

I took a personal break on the fifth day of our Halloween Countdown, and sneaked a little surprise into the pocket that day. It was easy for me and fun for the kids: a win-win situation! I picked up a few little things from Target and Walmart just for this purpose. This time they each got a little plastic skeleton, sold from Target in a pack of two for just $1.

The next day our note said to have a spooky Halloween lunch. I made the kids some Halloween shapes Kraft Macaroni and Cheese (5 for $5 at Target) which was really cute. It has jack-o-lanterns, bats, and ghosts in it. I also made some hot dog monsters... so easy. I sliced a hot dog to have eight tentacles and added eyes and a nose using a dab of mustard. This idea is also great for summer because it can be an octopus! I'm pretty sure I saw this in a magazine once and just stashed it in the back of my head for another day... probably a Parents or a Parenting: the Early Years magazine.


Here's a second spooky lunch idea that we had one day just for fun! I took grilled cheese sandwiches and cut out pumpkin faces in one slice of bread before cooking to make a jack-o-lantern. I was pleasantly surprised to discover the cheese did NOT seep through the holes and make a mess on my skillet! Secondly, I served tomato soup and piped some concentric circles onto it with sour cream using a sandwich bag. Again I was happy to find it didn't sink! Then I dragged a toothpick through it to create a spider web. Yummy and yucky at the same time - Halloween success!

Tuesday, October 4, 2011

Ghost Craft plus a Snack

Day 4 of our Halloween Countdown was all about ghosts! We made ghost ornaments and had a ghostly snack.

For ornaments, I tore apart an old (but clean) egg carton. I had Molly (4) draw faces on each one with permanent markers. She liked adding extras like hair and noses... not your normal ghostly features, but it was fun. This was also a good time for a lesson on emotions because each face turned out so different! After the faces were complete, Molly poked a hole in each top simply with a ball point pen. I threaded some yarn through and knotted the end a few times so it wouldn't slip out. We hung the little army of ghosts in our tree out front, on varying lengths of yarn. They're surprisingly visible from the street!

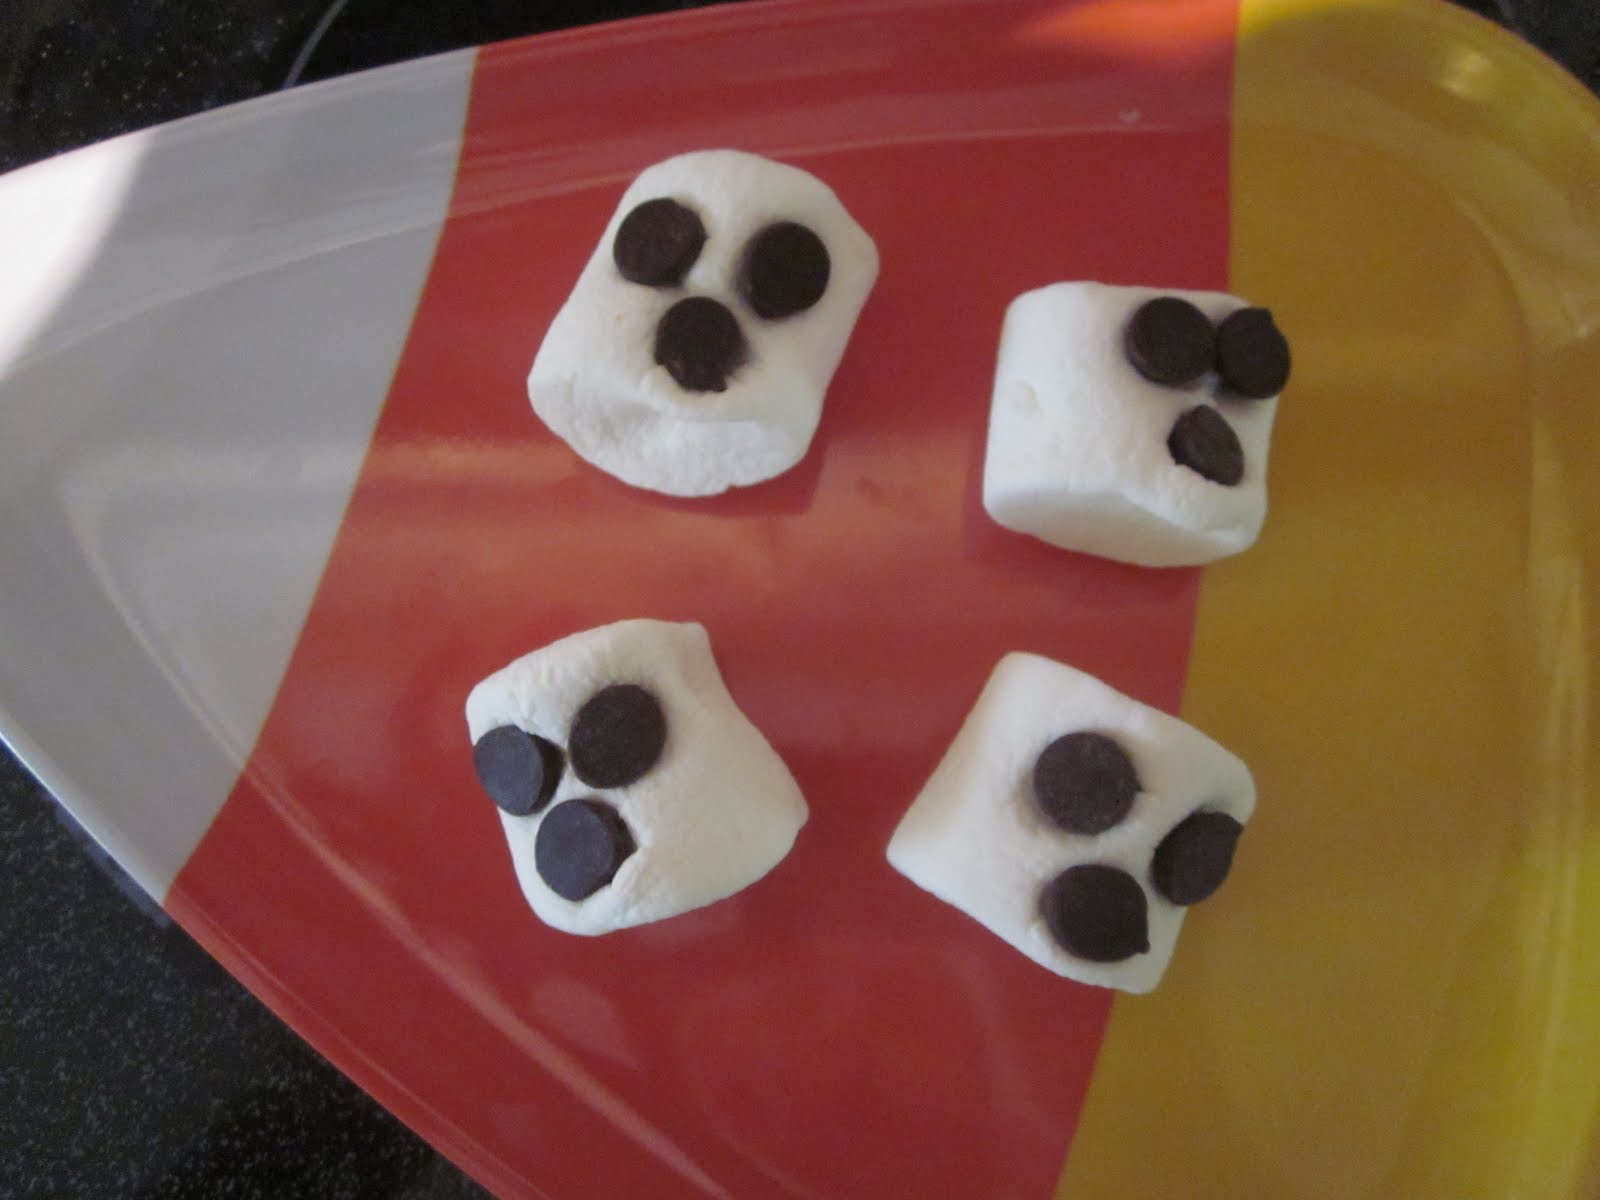
After the decorating was done, I sneaked in the kitchen to make a quick and very simple snack: marshmallow ghosts! I came up with this idea literally right before I executed it, they were so ridiculously easy. I wasn't even going to blog about it, but Molly was so excited for them.

Start with a marshmallow. Press three chocolate chips into it to create a ghost face. I kind of pinched open the marshmallow before pressing in the chocolate chips to help it stick. Done.