Our special activity for today was to have a special snack. This is one of the many easier activities in my Christmas Countdown Calendar. For a full list of ideas, click HERE!
Usually on my "special snack" days I throw together something I come up with on my own or have seen on Pinterest. Today it was the latter and is probably a variation of what I saw since I didn't go back to check on the directions... (I've said it before and I'll say it again: I'm not interested in perfection!!)
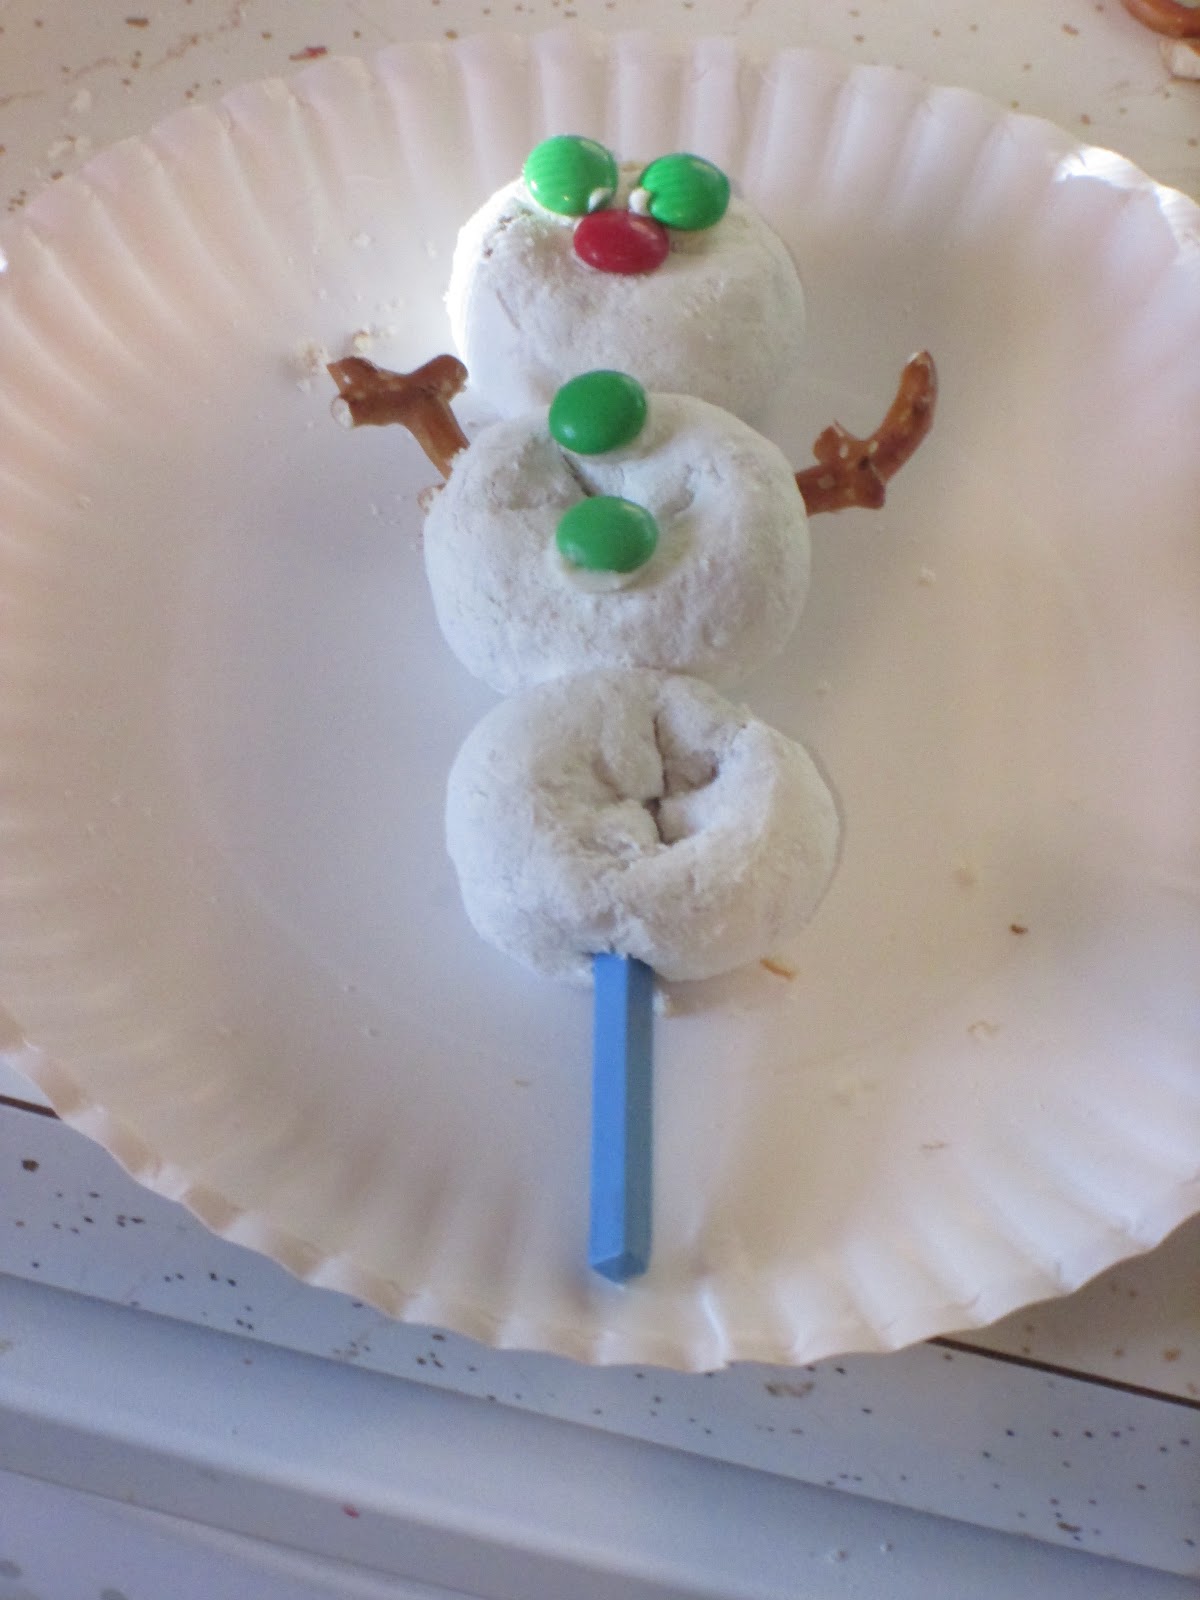
Slide three mini white powder donuts onto a chopstick. YES - I used the last remaining Hostess Donettes in my house for these!! This was a very precious snack and I'm glad my kids (ages 2 and 5) appreciated them!
Stick on M&M's for the eyes, nose, and buttons using white frosting. Break some little pretzels into "sticks" and poke them in the sides to be arms. Try to use a skinny stick or else your donuts might break apart! Otherwise, you can actually eat your donuts right off the stick!!
Showing posts with label snowman. Show all posts
Wednesday, December 12, 2012
Tuesday, December 11, 2012
Fun Snowman Quesadillas
I love making fun snacks and meals for my kids. Here is a quick way to liven up a simple quesadilla!
Use a cookie cutter to make snowman shaped flour tortillas. You'll need two identical pieces per quesadilla.
Sprinkle some cheese (I like to use cheddar or a cheddar/jack blend) in between the two tortillas. Microwave until the cheese is melted, about 21 seconds. You can also cook this on a skillet for just a few minutes and it would be even more delicioso. (See what I did there? hehe)
Once your snowman is cooked and on the plate, start making his face! Use a single string of shredded cheddar cheese as his carrot nose. Then spoon some sour cream into a small plastic sandwich bag. Add in a couple drops of food coloring. I thought blue looked good since I didn't have black. Snip a TINY TINY TINY piece of the corner off your bag and pipe the eyes, mouth, and buttons on your snowman.
Finally, sprinkle some grated Parmesan cheese along the bottom of your snowman so it looks like he's on a mound of snow!! I made this for lunch one day for my kids (ages 2 and 5) plus my daughter's friend and they were a big hit! It took a plain lunch and turned it into something special, and that's what this blog is all about!
P.S. Check out another yummy snack you can make with flour tortillas from my blog HERE!
Use a cookie cutter to make snowman shaped flour tortillas. You'll need two identical pieces per quesadilla.
Sprinkle some cheese (I like to use cheddar or a cheddar/jack blend) in between the two tortillas. Microwave until the cheese is melted, about 21 seconds. You can also cook this on a skillet for just a few minutes and it would be even more delicioso. (See what I did there? hehe)
Once your snowman is cooked and on the plate, start making his face! Use a single string of shredded cheddar cheese as his carrot nose. Then spoon some sour cream into a small plastic sandwich bag. Add in a couple drops of food coloring. I thought blue looked good since I didn't have black. Snip a TINY TINY TINY piece of the corner off your bag and pipe the eyes, mouth, and buttons on your snowman.
Finally, sprinkle some grated Parmesan cheese along the bottom of your snowman so it looks like he's on a mound of snow!! I made this for lunch one day for my kids (ages 2 and 5) plus my daughter's friend and they were a big hit! It took a plain lunch and turned it into something special, and that's what this blog is all about!
P.S. Check out another yummy snack you can make with flour tortillas from my blog HERE!
Monday, December 10, 2012
S'mores Snowman Snack
I recently procured a couple extra bags of large marshmallows so we have made several s'mores lately - in our oven! After a few plain ones, I decided to try something cute and came up with these easy and fun snowmen s'mores!
Start by lining a cookie sheet with foil, to keep it clean. Set out a few marshmallows on it and broil on high for about 4 minutes. If you want your marshmallows to have that yummy toasted coating, gently turn them over and broil for another 3 minutes or so on the other side.
Place two or three marshmallows on a plate and carefully flatten them down if desired. I made my snowman below with only two marshmallows just because my plate was so small. Three would look more like a real snowman actually... eh - I'm not worried about perfection! ;O) My kids still loved them!
Use chocolate chips for the eyes and smile... and buttons if you used three marshmallows!! I used an orange "Fruity Pebble" cereal for the carrot nose. Other ideas might be an orange fruit snack, piece of orange tootsie roll, or a golden raisin. For the stick arms, I melted 1/4 cup of semi-sweet chocolate chips and placed them in a small plastic sandwich bag. Trim a TINY corner of the bag and pipe it onto your plate.
As I type this, I realize that my "s'more" doesn't have any graham crackers... wouldn't it be cute to make a graham cracker hat?? NEXT TIME! lol
Start by lining a cookie sheet with foil, to keep it clean. Set out a few marshmallows on it and broil on high for about 4 minutes. If you want your marshmallows to have that yummy toasted coating, gently turn them over and broil for another 3 minutes or so on the other side.
Place two or three marshmallows on a plate and carefully flatten them down if desired. I made my snowman below with only two marshmallows just because my plate was so small. Three would look more like a real snowman actually... eh - I'm not worried about perfection! ;O) My kids still loved them!
Use chocolate chips for the eyes and smile... and buttons if you used three marshmallows!! I used an orange "Fruity Pebble" cereal for the carrot nose. Other ideas might be an orange fruit snack, piece of orange tootsie roll, or a golden raisin. For the stick arms, I melted 1/4 cup of semi-sweet chocolate chips and placed them in a small plastic sandwich bag. Trim a TINY corner of the bag and pipe it onto your plate.
As I type this, I realize that my "s'more" doesn't have any graham crackers... wouldn't it be cute to make a graham cracker hat?? NEXT TIME! lol
Thursday, January 19, 2012
Water Bottle Snowman
We still haven't gotten a chance to play in the snow and build a real snowman this winter, but we did make one at our kitchen table today! I found this great project in the December/January 2012 issue of Family Fun magazine and as always their ideas are perfect! Here's what you'll need:
water bottle
white tissue paper
glue or decoupage
black construction paper
whatever you want to make your snowman's face!
I grabbed an empty water bottle and washed it and dried it out - yea for recycling! Using my handy old steak knife (previously mentioned in another blog for cutting cardboard), I cut out the very bottom of the water bottle. Now it is ready for your child to work with!
Molly (4) covered the whole bottle, minus the lid, with decoupage glue using a paint brush. If you are using regular glue, you might want to mix it with some water for a thinner consistency. Tear up some white tissue paper into small pieces and cover the entire bottle with them... again minus the lid. This was another recycled part of the project because we used tissue paper that had been used to wrap a gift at Christmas!
When the bottle is covered, paint another layer of glue or decoupage on top and allow it all to dry for a bit. Use black construction paper to cover the lid by gluing a circle on top and a strip of paper around the sides. This will be your snowman's hat! Then add a face and buttons using whatever you have on hand. You could use sequins, buttons or craft pom poms to name a few. We used foam stickers that we cut into smaller shapes and glued on. Finally, add a scarf by tying on a small strip of fabric or ribbon!

Now that your snowman is complete, put a battery-operated tea light inside and watch him glow! I found 3-packs of the tea lights for a dollar at the Dollar Tree - score!
water bottle
white tissue paper
glue or decoupage
black construction paper
whatever you want to make your snowman's face!
I grabbed an empty water bottle and washed it and dried it out - yea for recycling! Using my handy old steak knife (previously mentioned in another blog for cutting cardboard), I cut out the very bottom of the water bottle. Now it is ready for your child to work with!
Molly (4) covered the whole bottle, minus the lid, with decoupage glue using a paint brush. If you are using regular glue, you might want to mix it with some water for a thinner consistency. Tear up some white tissue paper into small pieces and cover the entire bottle with them... again minus the lid. This was another recycled part of the project because we used tissue paper that had been used to wrap a gift at Christmas!
When the bottle is covered, paint another layer of glue or decoupage on top and allow it all to dry for a bit. Use black construction paper to cover the lid by gluing a circle on top and a strip of paper around the sides. This will be your snowman's hat! Then add a face and buttons using whatever you have on hand. You could use sequins, buttons or craft pom poms to name a few. We used foam stickers that we cut into smaller shapes and glued on. Finally, add a scarf by tying on a small strip of fabric or ribbon!

Now that your snowman is complete, put a battery-operated tea light inside and watch him glow! I found 3-packs of the tea lights for a dollar at the Dollar Tree - score!
Subscribe to:
Posts (Atom)