I found this adorable Santa hand print idea on Pinterest and had to try it. What a fun way to make a Christmas card or just to display on your fridge. This would be a great little project to do every year and see how much your child's hand print has grown!
I used my favorite - washable Crayola paints - for this project. Simply paint your child's hand with the appropriate colors - white on their four fingers, including the top of their palm and up both sides. Also a circle of white on the tip of their thumb. Now paint the rest of their thumb red, along with the bottom of their palm, leaving a rectangle of blank space in the middle. Fill that rectangle with Santa's face. If you don't have an appropriate skin tone, you can use a base of yellow paint, covered with a layer of orange paint.
This hand print shows up really well on darker paper. Once it's dry (which only takes a couple minutes if you used the Crayola paint and it didn't get too thick), use a permanent marker to draw on Santa's eyes and nose in black. Add a little round mouth in red marker, as if he's saying "Ho! Ho! Ho!"
I am in love with this hand print!!
Showing posts with label Christmas. Show all posts
Saturday, December 22, 2012
Reindeer Pretzel Rods
My two- year old looooves "big daddy pretzel sticks" - aka - pretzel rods. You can find them by the bag at regular grocery stores, or in a neat plastic canister from Aldi. It is so fun and easy to dress them up with melted chocolate or almond bark. Here is a fun reindeer pretzel stick I came up with for Christmas! I know Santa would like to get one of these on Christmas Eve, and they are great snacks for a holiday party as well!
Start by melting almond bark in the microwave. I like to melt mine in a ceramic coffee mug so it's deeper and has a handle. You'll need about 6 squares of the almond bark for this recipe. Microwave it for about 21 seconds at a time, stirring in between each time until it is all smooth.
Dip each pretzel rod into your melted almond bark, tipping the mug at a 45 degree angle if you want more of the pretzel to get covered. I like just covering the tip so it doesn't get too overwhelmingly sweet. Lay your pretzel rods on a sheet of wax paper.
Before the almond bark hardens all the way, add mini M&M's or chocolate chips for the eyes and nose. Use red ones to make little Rudolfs! My daughter (5) was in charge of this part. She also helped with the dipping above, so this is a very kid-friendly snack!
Finally, break off small twisted pretzels to look like antlers. You might use up quite a few that break all the way through but just eat up the extras! Place them at the top sides of your pretzel rods, resting in the melted almond bark. Since I made this up as I went along, I was so happy to discover they all stayed in once the almond bark was hardened. Woohoo!
Just let your pretzel rods sit out until they are hardened, which doesn't take very long. Maybe an hour or two. These are super cute and yummy snacks to make. Great to pass along to friends or teachers as well!
Start by melting almond bark in the microwave. I like to melt mine in a ceramic coffee mug so it's deeper and has a handle. You'll need about 6 squares of the almond bark for this recipe. Microwave it for about 21 seconds at a time, stirring in between each time until it is all smooth.
Dip each pretzel rod into your melted almond bark, tipping the mug at a 45 degree angle if you want more of the pretzel to get covered. I like just covering the tip so it doesn't get too overwhelmingly sweet. Lay your pretzel rods on a sheet of wax paper.
Before the almond bark hardens all the way, add mini M&M's or chocolate chips for the eyes and nose. Use red ones to make little Rudolfs! My daughter (5) was in charge of this part. She also helped with the dipping above, so this is a very kid-friendly snack!
Finally, break off small twisted pretzels to look like antlers. You might use up quite a few that break all the way through but just eat up the extras! Place them at the top sides of your pretzel rods, resting in the melted almond bark. Since I made this up as I went along, I was so happy to discover they all stayed in once the almond bark was hardened. Woohoo!
Just let your pretzel rods sit out until they are hardened, which doesn't take very long. Maybe an hour or two. These are super cute and yummy snacks to make. Great to pass along to friends or teachers as well!
Friday, December 14, 2012
Christmas Handprint Reindeer and Wreath Craft
I love making gifts and decorations using my kids' hand prints! Here are two fun and easy ideas to make for Christmas.
Start by tracing your child's hand and cutting it out. You might want to make one really good hand print on a piece of card stock or cardboard so you can reuse it for other projects. Just be sure to make a new hand print every once in a while so you can still capture your child's hand growing!!
Rudolf the Red Nosed Reindeer Puppet
Here's what you'll need:
brown construction paper
craft sticks
googly eyes
red craft pom pom
brown paper lunch sack
Use your hand print pattern to cut out two hands from brown construction paper. Attach them to the back of your paper lunch sack - I used glue dots (LOVE those!). Be sure the thumbs are facing together so your "antlers" are symmetrical. If the hand print is larger and kind of flimsy, secure a craft stick to the back to keep it from flopping over. Again, I used glue dots. My son's hand prints (age 2) were small enough to stand up straight on their own.
Have your child make Rudolf's face using googly eyes and a red craft pom pom. They could also use crayons or markers to draw it on, too. My kids had so much fun playing with these little puppets and they were so fast to make! They ran around making their reindeer fly and then pretended to be elves taking care of Santa's reindeer. It was a very fun project!
While they were playing with their new puppets, I busied myself creating another holiday hand print keepsake:
Hand Print Paper Wreath
Cut out multiple hand prints using your "handy" hand print template. (hehe) You'll need about eight hand prints from each child, all cut out of green construction paper. You can use different shades of green, or some green-patterned scrapbook paper would be really cute too! When you have enough cut out, lay them out to create a circle, careful to overlap them all just the same. For my wreath, I used hand prints from both of my kids so it is double layered, but you can make just a single layer wreath too.
Carefully glue the hand prints together, using a glue stick or - you guessed it - glue dots. Finish it off with a simple gift bow. I chose to display mine on the wall by my kitchen table so I just used rolled up scotch tape to hang it. You can also use a hole punch to tie a ribbon to it and hang it that way!
Need your wreath to be a little more sturdy? Attach a paper plate to the back with it's middle cut out. For a similar wreath I made with my daughter last year, click HERE.
Start by tracing your child's hand and cutting it out. You might want to make one really good hand print on a piece of card stock or cardboard so you can reuse it for other projects. Just be sure to make a new hand print every once in a while so you can still capture your child's hand growing!!
Rudolf the Red Nosed Reindeer Puppet
Here's what you'll need:
brown construction paper
craft sticks
googly eyes
red craft pom pom
brown paper lunch sack
Use your hand print pattern to cut out two hands from brown construction paper. Attach them to the back of your paper lunch sack - I used glue dots (LOVE those!). Be sure the thumbs are facing together so your "antlers" are symmetrical. If the hand print is larger and kind of flimsy, secure a craft stick to the back to keep it from flopping over. Again, I used glue dots. My son's hand prints (age 2) were small enough to stand up straight on their own.
Have your child make Rudolf's face using googly eyes and a red craft pom pom. They could also use crayons or markers to draw it on, too. My kids had so much fun playing with these little puppets and they were so fast to make! They ran around making their reindeer fly and then pretended to be elves taking care of Santa's reindeer. It was a very fun project!
While they were playing with their new puppets, I busied myself creating another holiday hand print keepsake:
Hand Print Paper Wreath
Cut out multiple hand prints using your "handy" hand print template. (hehe) You'll need about eight hand prints from each child, all cut out of green construction paper. You can use different shades of green, or some green-patterned scrapbook paper would be really cute too! When you have enough cut out, lay them out to create a circle, careful to overlap them all just the same. For my wreath, I used hand prints from both of my kids so it is double layered, but you can make just a single layer wreath too.
Carefully glue the hand prints together, using a glue stick or - you guessed it - glue dots. Finish it off with a simple gift bow. I chose to display mine on the wall by my kitchen table so I just used rolled up scotch tape to hang it. You can also use a hole punch to tie a ribbon to it and hang it that way!
Need your wreath to be a little more sturdy? Attach a paper plate to the back with it's middle cut out. For a similar wreath I made with my daughter last year, click HERE.
Labels:
Christmas,
crafts,
handprints,
holiday,
paper plates
Thursday, December 13, 2012
Frosty's Musical Snowflakes Party Game
Here is a fun game to play at holiday parties this year, or just as some fun indoor exercise during the cold winter months! I collected some ideas from different games I found online to come up with a new version of musical chairs: "Frosty's Musical Snowflakes!"
Start with several white paper plates. You'll need enough for each kid to have one. I decorated mine with the same snowflake design on each, drawn on with a permanent marker.
On the back of just ONE plate, draw a red circle to be the "Hot Spot!" Be sure you can't see it through the plate from the front.
Now scatter all the plates around the floor, completely randomly without knowing where the "Hot Spot" is. Have the kids pretend to be snowmen and dance around among the plates while you play some music; preferably "Frosty the Snowman!" I like the version by Gene Autry.
When you stop the music, have the kids jump to the nearest snowflake. Once everyone is standing still, tell them to look under their paper plate to see who is standing on the "Hot Spot." Whoever landed on it has to MELT and is out of the game.
Gather all the plates from the floor and take away one regular plate from the mix. Have the kids close their eyes as you once again scatter the snowflakes on the floor, not knowing where the "Hot Spot" ends up. Then everyone opens their eyes and the game continues for another round, minus one player. Play continues until only one person is left standing!
We played several fun rounds with just my daughter (5) and I, with several snowflakes out and it turned into a fun game of chance to see if one of us landed on the "Hot Spot." Even my 2 year old can play this one!
I would recommend making a few extra plain snowflake plates as well as an extra "Hot Spot" plate just in case any of them get torn or bent. If the "Hot Spot" gets scuffed or bent, for example, kids will know which one it is and try to avoid it. ;O)
For another fun holiday party idea, check out the Wrapping Paper Game from a blog I wrote last year! I plan to use this game at Molly's class party as well, with a package of pencils so all the kids will get one.
Start with several white paper plates. You'll need enough for each kid to have one. I decorated mine with the same snowflake design on each, drawn on with a permanent marker.
On the back of just ONE plate, draw a red circle to be the "Hot Spot!" Be sure you can't see it through the plate from the front.
Now scatter all the plates around the floor, completely randomly without knowing where the "Hot Spot" is. Have the kids pretend to be snowmen and dance around among the plates while you play some music; preferably "Frosty the Snowman!" I like the version by Gene Autry.
When you stop the music, have the kids jump to the nearest snowflake. Once everyone is standing still, tell them to look under their paper plate to see who is standing on the "Hot Spot." Whoever landed on it has to MELT and is out of the game.
Gather all the plates from the floor and take away one regular plate from the mix. Have the kids close their eyes as you once again scatter the snowflakes on the floor, not knowing where the "Hot Spot" ends up. Then everyone opens their eyes and the game continues for another round, minus one player. Play continues until only one person is left standing!
We played several fun rounds with just my daughter (5) and I, with several snowflakes out and it turned into a fun game of chance to see if one of us landed on the "Hot Spot." Even my 2 year old can play this one!
I would recommend making a few extra plain snowflake plates as well as an extra "Hot Spot" plate just in case any of them get torn or bent. If the "Hot Spot" gets scuffed or bent, for example, kids will know which one it is and try to avoid it. ;O)
For another fun holiday party idea, check out the Wrapping Paper Game from a blog I wrote last year! I plan to use this game at Molly's class party as well, with a package of pencils so all the kids will get one.
Labels:
activities,
Christmas,
games,
holiday,
paper plates,
party ideas,
snowflakes
Wednesday, December 12, 2012
White Donut Snowman Snack
Our special activity for today was to have a special snack. This is one of the many easier activities in my Christmas Countdown Calendar. For a full list of ideas, click HERE!
Usually on my "special snack" days I throw together something I come up with on my own or have seen on Pinterest. Today it was the latter and is probably a variation of what I saw since I didn't go back to check on the directions... (I've said it before and I'll say it again: I'm not interested in perfection!!)
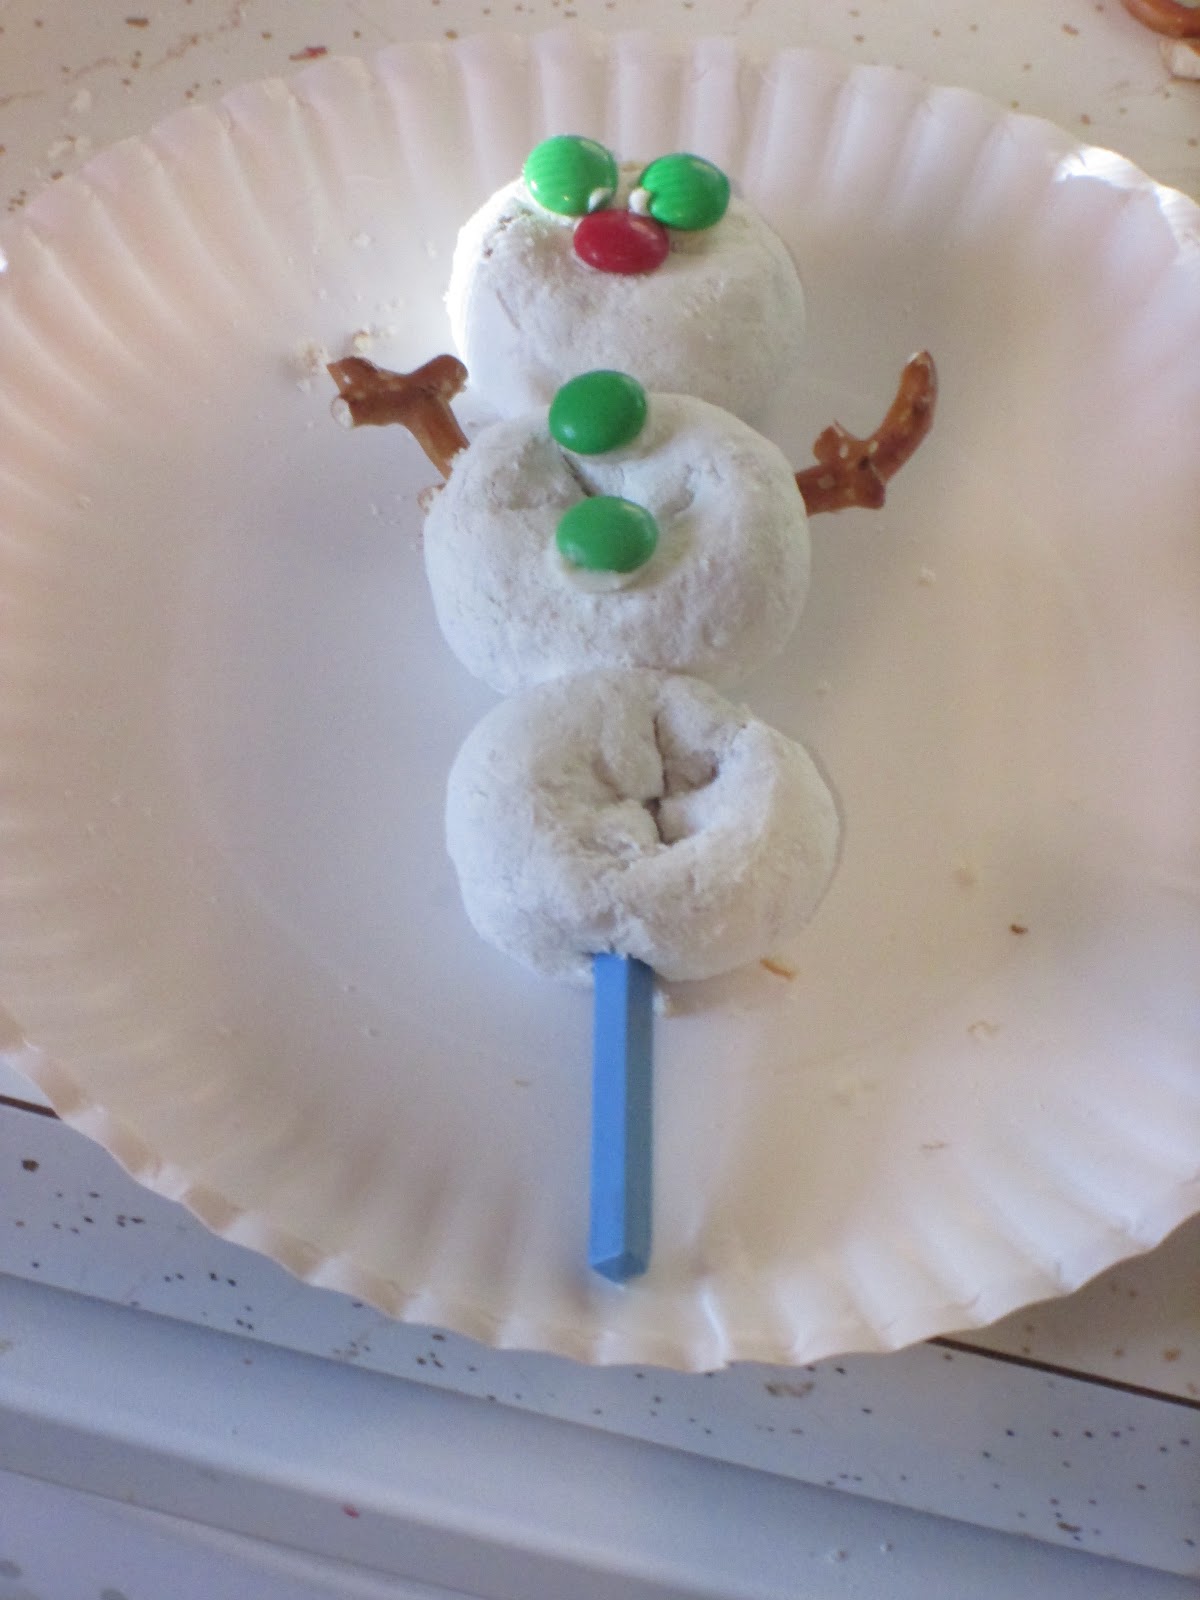
Slide three mini white powder donuts onto a chopstick. YES - I used the last remaining Hostess Donettes in my house for these!! This was a very precious snack and I'm glad my kids (ages 2 and 5) appreciated them!
Stick on M&M's for the eyes, nose, and buttons using white frosting. Break some little pretzels into "sticks" and poke them in the sides to be arms. Try to use a skinny stick or else your donuts might break apart! Otherwise, you can actually eat your donuts right off the stick!!
Usually on my "special snack" days I throw together something I come up with on my own or have seen on Pinterest. Today it was the latter and is probably a variation of what I saw since I didn't go back to check on the directions... (I've said it before and I'll say it again: I'm not interested in perfection!!)
Slide three mini white powder donuts onto a chopstick. YES - I used the last remaining Hostess Donettes in my house for these!! This was a very precious snack and I'm glad my kids (ages 2 and 5) appreciated them!
Stick on M&M's for the eyes, nose, and buttons using white frosting. Break some little pretzels into "sticks" and poke them in the sides to be arms. Try to use a skinny stick or else your donuts might break apart! Otherwise, you can actually eat your donuts right off the stick!!
Tuesday, December 11, 2012
Fun Snowman Quesadillas
I love making fun snacks and meals for my kids. Here is a quick way to liven up a simple quesadilla!
Use a cookie cutter to make snowman shaped flour tortillas. You'll need two identical pieces per quesadilla.
Sprinkle some cheese (I like to use cheddar or a cheddar/jack blend) in between the two tortillas. Microwave until the cheese is melted, about 21 seconds. You can also cook this on a skillet for just a few minutes and it would be even more delicioso. (See what I did there? hehe)
Once your snowman is cooked and on the plate, start making his face! Use a single string of shredded cheddar cheese as his carrot nose. Then spoon some sour cream into a small plastic sandwich bag. Add in a couple drops of food coloring. I thought blue looked good since I didn't have black. Snip a TINY TINY TINY piece of the corner off your bag and pipe the eyes, mouth, and buttons on your snowman.
Finally, sprinkle some grated Parmesan cheese along the bottom of your snowman so it looks like he's on a mound of snow!! I made this for lunch one day for my kids (ages 2 and 5) plus my daughter's friend and they were a big hit! It took a plain lunch and turned it into something special, and that's what this blog is all about!
P.S. Check out another yummy snack you can make with flour tortillas from my blog HERE!
Use a cookie cutter to make snowman shaped flour tortillas. You'll need two identical pieces per quesadilla.
Sprinkle some cheese (I like to use cheddar or a cheddar/jack blend) in between the two tortillas. Microwave until the cheese is melted, about 21 seconds. You can also cook this on a skillet for just a few minutes and it would be even more delicioso. (See what I did there? hehe)
Once your snowman is cooked and on the plate, start making his face! Use a single string of shredded cheddar cheese as his carrot nose. Then spoon some sour cream into a small plastic sandwich bag. Add in a couple drops of food coloring. I thought blue looked good since I didn't have black. Snip a TINY TINY TINY piece of the corner off your bag and pipe the eyes, mouth, and buttons on your snowman.
Finally, sprinkle some grated Parmesan cheese along the bottom of your snowman so it looks like he's on a mound of snow!! I made this for lunch one day for my kids (ages 2 and 5) plus my daughter's friend and they were a big hit! It took a plain lunch and turned it into something special, and that's what this blog is all about!
P.S. Check out another yummy snack you can make with flour tortillas from my blog HERE!
Monday, December 10, 2012
S'mores Snowman Snack
I recently procured a couple extra bags of large marshmallows so we have made several s'mores lately - in our oven! After a few plain ones, I decided to try something cute and came up with these easy and fun snowmen s'mores!
Start by lining a cookie sheet with foil, to keep it clean. Set out a few marshmallows on it and broil on high for about 4 minutes. If you want your marshmallows to have that yummy toasted coating, gently turn them over and broil for another 3 minutes or so on the other side.
Place two or three marshmallows on a plate and carefully flatten them down if desired. I made my snowman below with only two marshmallows just because my plate was so small. Three would look more like a real snowman actually... eh - I'm not worried about perfection! ;O) My kids still loved them!
Use chocolate chips for the eyes and smile... and buttons if you used three marshmallows!! I used an orange "Fruity Pebble" cereal for the carrot nose. Other ideas might be an orange fruit snack, piece of orange tootsie roll, or a golden raisin. For the stick arms, I melted 1/4 cup of semi-sweet chocolate chips and placed them in a small plastic sandwich bag. Trim a TINY corner of the bag and pipe it onto your plate.
As I type this, I realize that my "s'more" doesn't have any graham crackers... wouldn't it be cute to make a graham cracker hat?? NEXT TIME! lol
Start by lining a cookie sheet with foil, to keep it clean. Set out a few marshmallows on it and broil on high for about 4 minutes. If you want your marshmallows to have that yummy toasted coating, gently turn them over and broil for another 3 minutes or so on the other side.
Place two or three marshmallows on a plate and carefully flatten them down if desired. I made my snowman below with only two marshmallows just because my plate was so small. Three would look more like a real snowman actually... eh - I'm not worried about perfection! ;O) My kids still loved them!
Use chocolate chips for the eyes and smile... and buttons if you used three marshmallows!! I used an orange "Fruity Pebble" cereal for the carrot nose. Other ideas might be an orange fruit snack, piece of orange tootsie roll, or a golden raisin. For the stick arms, I melted 1/4 cup of semi-sweet chocolate chips and placed them in a small plastic sandwich bag. Trim a TINY corner of the bag and pipe it onto your plate.
As I type this, I realize that my "s'more" doesn't have any graham crackers... wouldn't it be cute to make a graham cracker hat?? NEXT TIME! lol
Saturday, December 1, 2012
Introductory Letter for your Elf on the Shelf
I have purchased a cute holiday edition Groovy Girls doll to be our secret Elf this Christmas! Click HERE for a link to purchase your own on Amazon.com. Check out my other blog post for a whole list of fun ideas to do with your elf all December long.
To go along with this fun new tradition, I have written a letter to my kids, from their new elf, explaining the story and rules for the Elf on the Shelf. You can use any part of this you'd like, just copy and paste it! Be sure to change it to your own elf's name!
"Holiday
Greetings! Time to rock and roll! ~ I’m Chrissy Christmas, sent from the North
Pole!
Santa
Claus sent me through cold snow and ice to be sure you’re not being NAUGHTY,
but NICE!
I’m one of
his elves and I’m on a mission to be sure you’re sweet and find out what you’re
wishin’.
I’ll be in
your house and watch you all day, then travel at night so far, far away
To tell
Santa about all the things that you’ve done. ~ I won’t miss a thing and we’ll
have some fun!
He’ll find
out about any fights or whining or messes you make,
but I’ll
also tell him about all the nice questions, sweet games, and hugs and kisses
you take!
Santa
loves to bring presents to good girls and boys, so be sure to follow these
simple joys:
Love each
other; talk nicely; be sure to help out; be respectful; be happy and don’t cry or pout.
Listen to
your mommy and daddy and teachers; be nice to friends, adults, and all of God’s
creatures.
After I
visit with Santa I’ll come back to your house ~ sneaking inside as quick as a
mouse.
Then each
morning when you are both awake, look around and find me – how long will it take?
Every day
I’ll be somewhere silly and new, ready to spend my day watching you!
My job is
important, Santa’s counting on me so please let me work and just leave me be.
I’ll have
enough fun watching and making you search, so just give me hugs then return to
my perch.
Your mommy
can move me all by herself, and there I’ll sit still – your Elf on the Shelf!
When you
leave cookies out on Christmas Eve night, leave me by them – I won’t take a
bite!
After
Santa leaves presents (like I’m sure he will), I’ll hop in his sleigh because
it is real!
I’ll fly
back to his workshop to spend the next year, but come Christmas time I’ll always
be here."
Friday, November 30, 2012
Elf on the Shelf Ideas
I have succumbed to the Elf on the Shelf phenomenon... and I can't wait to get started!! :OD As the story goes, Santa sends a little elf to your house to watch over your kids. Then the elf reports back to the North Pole each night whether they've been naughty or nice! The next morning, the elf is found in a new funny place in the house! Then on Christmas Eve, the elf returns to the North Pole to spend the year with Santa until returning to your house again next time.
Our elf will "arrive" on December 1st. I guess some families' elves start on Thanksgiving but I'm a little behind because I had kind of an issue choosing an elf. After an epic search for the perfect elf that wasn't too big, wasn't too small, wasn't too creepy and wasn't too expensive, I found a super cute elf on Amazon and had her over-nighted. Chrissy Christmas was delivered just in time!
Here is a list of ideas I've compiled for your own Elf on the Shelf! Some ideas I came up with myself and some of them are from Pinterest. I'll depict those with a (P) after them. Check out my Pinterest board called "Believe" for more ideas I've collected by clicking HERE.
1. Hanging garland or a new ornament on your Christmas tree
2. Dangling from the stairs railing with a rope like he's climbing a mountain
3. Peeking at the next activity on your Christmas Countdown Calendar
4. Making a snow angel in flour or sugar on the counter (P)
5. Building a snowman out of marshmallows (P)
6. By the window with new window clings to hang
7. By the cat (pet) dishes with a new toy for your pet
8. On an easel/chalkboard/paper with a hand drawn picture or note for your kids
9. On the couch with tv remote and bowl of popcorn (P)
10. Popping out of a box of facial tissues with tissues scattered around
11. Playing a board game or card game with other toys (P)
12. Inside your child's dresser drawer trying on their clothes
13. Reading books to an audience of stuffed animals (P)
14. Hiding inside your child's backpack with a new pencil
15. In the bathroom with a marker and a special message or picture drawn on the mirror (P)
16. Lining up a row of toy cars (P)
17. On a picture frame having drawn mustaches or silly faces with washable markers on the glass (P)
18. Hiding in a toy box
19. Peeking out from under your child's pillow
20. In front of the mirror trying on hair bows
21. Hanging onto a ceiling fan ready for a ride
22. With candy or cereal scattered around them and your child's name or a message spelled out in the mess (P)
23. Riding inside a toy truck or a ride-on toy
24. Inside the refrigerator all wrapped up in a small blanket to keep warm
Our elf will "arrive" on December 1st. I guess some families' elves start on Thanksgiving but I'm a little behind because I had kind of an issue choosing an elf. After an epic search for the perfect elf that wasn't too big, wasn't too small, wasn't too creepy and wasn't too expensive, I found a super cute elf on Amazon and had her over-nighted. Chrissy Christmas was delivered just in time!
Here is a list of ideas I've compiled for your own Elf on the Shelf! Some ideas I came up with myself and some of them are from Pinterest. I'll depict those with a (P) after them. Check out my Pinterest board called "Believe" for more ideas I've collected by clicking HERE.
1. Hanging garland or a new ornament on your Christmas tree
2. Dangling from the stairs railing with a rope like he's climbing a mountain
3. Peeking at the next activity on your Christmas Countdown Calendar
4. Making a snow angel in flour or sugar on the counter (P)
5. Building a snowman out of marshmallows (P)
6. By the window with new window clings to hang
7. By the cat (pet) dishes with a new toy for your pet
8. On an easel/chalkboard/paper with a hand drawn picture or note for your kids
9. On the couch with tv remote and bowl of popcorn (P)
10. Popping out of a box of facial tissues with tissues scattered around
11. Playing a board game or card game with other toys (P)
12. Inside your child's dresser drawer trying on their clothes
13. Reading books to an audience of stuffed animals (P)
14. Hiding inside your child's backpack with a new pencil
15. In the bathroom with a marker and a special message or picture drawn on the mirror (P)
16. Lining up a row of toy cars (P)
17. On a picture frame having drawn mustaches or silly faces with washable markers on the glass (P)
18. Hiding in a toy box
19. Peeking out from under your child's pillow
20. In front of the mirror trying on hair bows
21. Hanging onto a ceiling fan ready for a ride
22. With candy or cereal scattered around them and your child's name or a message spelled out in the mess (P)
23. Riding inside a toy truck or a ride-on toy
24. Inside the refrigerator all wrapped up in a small blanket to keep warm
Christmas Countdown Calendar Activities
So apparently I took off the entire month of November from blogging... until today. It wasn't a planned break and I still made lots of crafts and fun snacks with my kids but I just didn't get around to documenting them! Oh well! I have so much planned for December, as always, so I really hope I can get it together and type this month!
I am so excited for December to finally be here! My favorite holiday tradition is our Christmas Countdown Calendar - started by my mom years ago. The fun twist is that for each day, there is a little note with a special activity to do that day. A friend of the family sewed the original calendar for us, which still hangs in my parent's house each year. When I moved out to college, my mom made a calendar for me, and a few years later she made a larger, more colorful one for my kids to enjoy.
The newest version is pictured below. She actually found the tree part with pockets at a store, then attached it a large back ground fabric and quilted it. She added sequins for some sparkle, our last name in felt letters up top, and a sleeve for hanging.
My mom always wrote each day's activity in little rhymes! I have taken to drawing pictures on my notes, since my kids aren't old enough to read yet (but Molly (5) is almost there!). I guarantee mine will also rhyme when Molly can read it!
Anyway, here is the complete list of activities I have planned for our December. They are already in the pockets and planned on my family calendar (though still a secret to the kids!) so I know what we'll be doing each day. Of course, depending on unexpected schedule changes and my overall mood (hehe) I will change up the days as needed. ;O)
1. Decorate the Christmas Tree
2. Open a special gift (these are usually something small like some silly lip glass or a new book)
3. Set up our Dept 56 North Pole Village
4. Write a letter to Santa (here's an idea for kids too young to write: Collage Letter)
5. Read special Christmas books (my kids will each receive a new book this day, too!)
6. Go play indoor mini golf
7. Decorate gingerbread men
8. Drive around to see lights - there's a neat display at the Great Mall in Olathe, KS!
9. Go see a movie at the theatre
10. Make a special craft. Here's one idea from last year: Paper Plate Santa
11. Visit Santa
12. Eat a special holiday snack. Here's a great party snack idea: Rice Crispy Treat Wreath
13. Go roller skating (or ice skating!)
14. Make a gingerbread house out of graham crackers (as seen on Pinterest...)
15. Open a special gift (I repeat this a few times... a new idea might be to make and send Christmas cards!)
16. Have a holiday party with your friends (or maybe just a play date with fun snacks and punch...)
17. Make a special craft (OR go on a special shopping trip)
18. Wrap presents and play the Wrapping Paper Game
19. Holiday party at school
20. Have a pajama party complete with popcorn and a Christmas movie
21. Bake cookies to leave out for Santa
22. Eat a special holiday meal
23. Play in the snow (weather permitting!) OR make a mini snowman with homemade play doh
24. Open a special present (surprise! It's pajamas from my mom and a blanket from me!)
25. CHRISTMAS!
Just in case you need a few extra ideas, here's some blasts from the past: eat dinner by candlelight; have an indoor picnic; watch Christmas specials on TV; go buy/cut down a Christmas tree; decorate your house - indoors and out; write a Holiday Top 10; write a funny parody of a Christmas carol; sing Christmas carols; choose a friend to send gifts and cards to from a Secret Santa; make a popcorn chain for your Christmas tree; attend a holiday ceremony at church; host a holiday cookie swap; volunteer at a soup kitchen; adopt a family to buy gifts for; go see The Nutcracker Ballet; find a holiday puppet show/play/book reading to attend!
I hope this is enough ideas to get you started on your own countdown calendar! I can't wait to share all the things we do this year with ours as we go along! HAPPY DECEMBER!
I am so excited for December to finally be here! My favorite holiday tradition is our Christmas Countdown Calendar - started by my mom years ago. The fun twist is that for each day, there is a little note with a special activity to do that day. A friend of the family sewed the original calendar for us, which still hangs in my parent's house each year. When I moved out to college, my mom made a calendar for me, and a few years later she made a larger, more colorful one for my kids to enjoy.
The newest version is pictured below. She actually found the tree part with pockets at a store, then attached it a large back ground fabric and quilted it. She added sequins for some sparkle, our last name in felt letters up top, and a sleeve for hanging.
My mom always wrote each day's activity in little rhymes! I have taken to drawing pictures on my notes, since my kids aren't old enough to read yet (but Molly (5) is almost there!). I guarantee mine will also rhyme when Molly can read it!
Anyway, here is the complete list of activities I have planned for our December. They are already in the pockets and planned on my family calendar (though still a secret to the kids!) so I know what we'll be doing each day. Of course, depending on unexpected schedule changes and my overall mood (hehe) I will change up the days as needed. ;O)
1. Decorate the Christmas Tree
2. Open a special gift (these are usually something small like some silly lip glass or a new book)
3. Set up our Dept 56 North Pole Village
4. Write a letter to Santa (here's an idea for kids too young to write: Collage Letter)
5. Read special Christmas books (my kids will each receive a new book this day, too!)
6. Go play indoor mini golf
7. Decorate gingerbread men
8. Drive around to see lights - there's a neat display at the Great Mall in Olathe, KS!
9. Go see a movie at the theatre
10. Make a special craft. Here's one idea from last year: Paper Plate Santa
11. Visit Santa
12. Eat a special holiday snack. Here's a great party snack idea: Rice Crispy Treat Wreath
13. Go roller skating (or ice skating!)
14. Make a gingerbread house out of graham crackers (as seen on Pinterest...)
15. Open a special gift (I repeat this a few times... a new idea might be to make and send Christmas cards!)
16. Have a holiday party with your friends (or maybe just a play date with fun snacks and punch...)
17. Make a special craft (OR go on a special shopping trip)
18. Wrap presents and play the Wrapping Paper Game
19. Holiday party at school
20. Have a pajama party complete with popcorn and a Christmas movie
21. Bake cookies to leave out for Santa
22. Eat a special holiday meal
23. Play in the snow (weather permitting!) OR make a mini snowman with homemade play doh
24. Open a special present (surprise! It's pajamas from my mom and a blanket from me!)
25. CHRISTMAS!
Just in case you need a few extra ideas, here's some blasts from the past: eat dinner by candlelight; have an indoor picnic; watch Christmas specials on TV; go buy/cut down a Christmas tree; decorate your house - indoors and out; write a Holiday Top 10; write a funny parody of a Christmas carol; sing Christmas carols; choose a friend to send gifts and cards to from a Secret Santa; make a popcorn chain for your Christmas tree; attend a holiday ceremony at church; host a holiday cookie swap; volunteer at a soup kitchen; adopt a family to buy gifts for; go see The Nutcracker Ballet; find a holiday puppet show/play/book reading to attend!
I hope this is enough ideas to get you started on your own countdown calendar! I can't wait to share all the things we do this year with ours as we go along! HAPPY DECEMBER!
Friday, December 23, 2011
Paper Plate Santa Project
This is a project I've done with Molly (4) for three years in a row now and it's so fun to see how different she does it each year! It makes a great decoration to hang up and she always like working with lots of glue! Here's what you'll need:
Paper Plate
Red Construction Paper
White Cotton Balls
Craft Pom Poms
Glue
In the past, I've cut out a Santa hat from red construction paper for Molly, but this year I simply drew one and had her cut it out and glue it on by herself. Then I let her go to town gluing on cotton balls. I always buy a big bag from Walmart or a dollar store because we go through a lot! Have your child glue on cotton balls for Santa's beard, plus a lining on his hat and one more on the tip of the hat. Use craft pom poms or markers or whatever else you can for Santa's face.
I tape a loop of curly ribbon to the back so I can hang it up easily and be sure to put the year on the back so you can compare them from one Christmas to the next! Here is a photo of Molly's Santa plate from last year, plus her new COLORFUL one from this year! (So sorry it keeps uploading sideways!) Next year I'll start Ben on making them, too! I can't wait to have a big collection of Santa plates!
Paper Plate
Red Construction Paper
White Cotton Balls
Craft Pom Poms
Glue
In the past, I've cut out a Santa hat from red construction paper for Molly, but this year I simply drew one and had her cut it out and glue it on by herself. Then I let her go to town gluing on cotton balls. I always buy a big bag from Walmart or a dollar store because we go through a lot! Have your child glue on cotton balls for Santa's beard, plus a lining on his hat and one more on the tip of the hat. Use craft pom poms or markers or whatever else you can for Santa's face.
I tape a loop of curly ribbon to the back so I can hang it up easily and be sure to put the year on the back so you can compare them from one Christmas to the next! Here is a photo of Molly's Santa plate from last year, plus her new COLORFUL one from this year! (So sorry it keeps uploading sideways!) Next year I'll start Ben on making them, too! I can't wait to have a big collection of Santa plates!
Rice Crispy Treat Wreath
Here is a super fun, yummy, EASY treat to make for any holiday party! Molly (4) and I made this for a Christmas party we went to and it was a big hit. It would also be good for family get togethers or a class party too. Or just for fun, of course!
Here's the ingredients you need for this Rice Crispy Treat Wreath:
6 cups crispy rice cereal
4 cups mini marshmallows OR 1 package of large marshmallows
3 tablespoons butter or margarine
1 teaspoon vanilla extract
green food coloring
frosting
chocolate candies
First, melt your butter with your marshmallows in a glass bowl in the microwave. Molly loves watching the marshmallows get big as they're cooking in there! You'll need to "nuke" them for about three minutes, stirring partway through. Then carefully mix in the cereal. Enjoy tasting the melted marshmallow. Add the vanilla extract and about 4-5 drops of food coloring, or until it reaches the shade of green you want.
Once it's all stirred together, use buttered hands to place it on your serving dish and shape it into a wreath. I'm not gonna lie - this part was fun! ;O) Finally, use some red frosting (I tinted some plain white store-bought frosting with red food coloring) to make a bow. Put the frosting in a zip lock baggie, cut a corner off, and pipe it on to make it easy. Lastly, have your kids decorate the wreath with red and green candies, like M&M's. We actually used little Hershey's Pieces which are just as delicious.
Here's the ingredients you need for this Rice Crispy Treat Wreath:
6 cups crispy rice cereal
4 cups mini marshmallows OR 1 package of large marshmallows
3 tablespoons butter or margarine
1 teaspoon vanilla extract
green food coloring
frosting
chocolate candies
First, melt your butter with your marshmallows in a glass bowl in the microwave. Molly loves watching the marshmallows get big as they're cooking in there! You'll need to "nuke" them for about three minutes, stirring partway through. Then carefully mix in the cereal. Enjoy tasting the melted marshmallow. Add the vanilla extract and about 4-5 drops of food coloring, or until it reaches the shade of green you want.
Once it's all stirred together, use buttered hands to place it on your serving dish and shape it into a wreath. I'm not gonna lie - this part was fun! ;O) Finally, use some red frosting (I tinted some plain white store-bought frosting with red food coloring) to make a bow. Put the frosting in a zip lock baggie, cut a corner off, and pipe it on to make it easy. Lastly, have your kids decorate the wreath with red and green candies, like M&M's. We actually used little Hershey's Pieces which are just as delicious.
Tuesday, December 20, 2011
Dish Towel Angels
I wanted Molly (4) to make a special gift for her preschool teachers, but I also wanted it to be something they could use and not just another nick-nack for their classroom. Together, we made Dish Towel Angels and they turned out so sweet! I hope her teachers liked them! I found this idea while I was going through old magazines and came across a December 2005 issue of Crafts'n'Things Magazine (it's one of my favorites!). Here's what you need:
1 pot holder
1 dish rag (or hand towel)
1 dish towel
Rubber Bands
Pipe Cleaners
Ribbon
We got all our supplies from the Dollar Tree. I knew they would have holiday dish towels and they were a lot less busy than Walmart next door! Molly picked out the designs she wanted for each teacher. We used Christmas ones, but it actually might be cooler to use non-seasonal ones so the person you're giving it to can display it for Christmas, and then undo it and use the towels for regular every-day use!
Start with your pot holder and wrap a rubber band around the middle of it to create the wings. Then, fold your dish towel accordion style, long ways. Fold it in half and wrap a rubber band around the folded edge, about 2-3 inches down to create the head. Finally, roll up your dish rag (or hand towel, like we used) long ways. Wrap rubber bands around each end, about 1 inch in to create hands.
Now you're ready to put your angel together! Use pipe cleaners to attach the arms behind and slightly below the neck, then attach the wings just above the back of the arms. Loop a rubber band around the hands to hold them together. Finally, create a pipe cleaner loop in the back for hanging... or use the loop on your pot holder if it has one!
You can finalize it by tying ribbon around the neck and hands to cover the rubber bands so it looks nicer. You can also attach something to the angel's hands like she's holding it, such as a gift card, recipe card, a cookie cutter, or a package of soup mix. We attached a wooden spoon and a gift tag to ours. Molly was so proud to give her hand-made gift to her teachers the next morning at school. I hope we can enjoy making these for years to come - I think I'll make it a traditional teacher gift with something different attached each time!
1 pot holder
1 dish rag (or hand towel)
1 dish towel
Rubber Bands
Pipe Cleaners
Ribbon
We got all our supplies from the Dollar Tree. I knew they would have holiday dish towels and they were a lot less busy than Walmart next door! Molly picked out the designs she wanted for each teacher. We used Christmas ones, but it actually might be cooler to use non-seasonal ones so the person you're giving it to can display it for Christmas, and then undo it and use the towels for regular every-day use!
Start with your pot holder and wrap a rubber band around the middle of it to create the wings. Then, fold your dish towel accordion style, long ways. Fold it in half and wrap a rubber band around the folded edge, about 2-3 inches down to create the head. Finally, roll up your dish rag (or hand towel, like we used) long ways. Wrap rubber bands around each end, about 1 inch in to create hands.
Now you're ready to put your angel together! Use pipe cleaners to attach the arms behind and slightly below the neck, then attach the wings just above the back of the arms. Loop a rubber band around the hands to hold them together. Finally, create a pipe cleaner loop in the back for hanging... or use the loop on your pot holder if it has one!
You can finalize it by tying ribbon around the neck and hands to cover the rubber bands so it looks nicer. You can also attach something to the angel's hands like she's holding it, such as a gift card, recipe card, a cookie cutter, or a package of soup mix. We attached a wooden spoon and a gift tag to ours. Molly was so proud to give her hand-made gift to her teachers the next morning at school. I hope we can enjoy making these for years to come - I think I'll make it a traditional teacher gift with something different attached each time!
Thursday, December 15, 2011
Glitter Tree Decoration
Here's a quick and fun project for your kids - and the result is a professional looking decoration!
Start with a foam cone. I found mine at the Dollar Tree (score!). Lay out some newspapers or an old table cloth and have your child paint the whole thing green. I had Molly (4) use a foam brush and it worked out great - didn't take so long that she lost interest! I really liked just getting out one color of paint and cleaning just one brush!
While the paint is still wet, sprinkle it all over with glitter. Do this over a sheet of paper or a paper plate so you can save any extra glitter that spills! We made a single tree that's about 6 inches tall and I love it! If your child has the attention span for it, create a whole forest of these wonderful sparkly trees to display!
Start with a foam cone. I found mine at the Dollar Tree (score!). Lay out some newspapers or an old table cloth and have your child paint the whole thing green. I had Molly (4) use a foam brush and it worked out great - didn't take so long that she lost interest! I really liked just getting out one color of paint and cleaning just one brush!
While the paint is still wet, sprinkle it all over with glitter. Do this over a sheet of paper or a paper plate so you can save any extra glitter that spills! We made a single tree that's about 6 inches tall and I love it! If your child has the attention span for it, create a whole forest of these wonderful sparkly trees to display!
Wednesday, December 14, 2011
Recycled Christmas Card Ornaments
I hate to throw away any Christmas card I get, but only a few special ones really need to be saved. I love to find uses for rest of them! Here are two more ornament ideas to reuse your old Christmas cards:
Dig through your pile and find some cards with cute or pretty designs on the front and cut out that design. It's best to use a regular shape like a circle, oval, square, or rectangle around the design. This was a great exercise in shapes and cutting for my daughter, Molly (4). Now you have the option of gluing a second design on the back in the same shape, or a piece of colorful scrapbook paper or construction paper instead. If you use paper as opposed to another card, you can add your own message or your child's name and the year.
Draw a line of glue all the way around your shape, preferably along the very edge. Sprinkle on some glitter and shake off. Let this dry and then attach a string to the top! Try using old-fashioned looking Christmas cards and some course silver glitter for an antique look! We also started using glitter to decorate the designs themselves, like adding decorations on a Christmas tree.
While we were working on these, Molly came up with a wonderful idea: to use the old cards as frames!! She cut out a frame from a metallic card and used it to frame a picture of a kitten she cut out from another card! Right now her creation is taped up on my living room wall, but meanwhile I took her idea and applied it to real pictures! I found some old Christmas cards with frames on the front: the kind you can see through to the image on the inside of the card. I cut them out and taped my photos to the back. Then I added glitter like normal and included the year and my kids' names. I was so happy with them and couldn't believe it was all Molly's idea!
Dig through your pile and find some cards with cute or pretty designs on the front and cut out that design. It's best to use a regular shape like a circle, oval, square, or rectangle around the design. This was a great exercise in shapes and cutting for my daughter, Molly (4). Now you have the option of gluing a second design on the back in the same shape, or a piece of colorful scrapbook paper or construction paper instead. If you use paper as opposed to another card, you can add your own message or your child's name and the year.
Draw a line of glue all the way around your shape, preferably along the very edge. Sprinkle on some glitter and shake off. Let this dry and then attach a string to the top! Try using old-fashioned looking Christmas cards and some course silver glitter for an antique look! We also started using glitter to decorate the designs themselves, like adding decorations on a Christmas tree.
While we were working on these, Molly came up with a wonderful idea: to use the old cards as frames!! She cut out a frame from a metallic card and used it to frame a picture of a kitten she cut out from another card! Right now her creation is taped up on my living room wall, but meanwhile I took her idea and applied it to real pictures! I found some old Christmas cards with frames on the front: the kind you can see through to the image on the inside of the card. I cut them out and taped my photos to the back. Then I added glitter like normal and included the year and my kids' names. I was so happy with them and couldn't believe it was all Molly's idea!
Sunday, December 11, 2011
The Wrapping Paper Game!
Wrapping presents with Molly (4) has been so much fun this year! The wrapping paper I bought has a grid printed on the back side which is so nice for Molly to practice cutting on. After I measure the size of sheet we need, I start cutting on one side and Molly starts cutting with her little scissors on the other side until we meet in the middle. She's also really good about putting on the tape just right. I love having my little helper; someone to take over my childhood job as "tape lady".
In the past, Molly happily crumpled and ripped the paper, hiding under it and stepping on it.... much like Ben (1) is doing as my other little helper this year! Ben's addition to the tasks however is pulling out lots and lots of tape!
After we finished wrapping, we talked about how you're supposed to say thank you and act gracious and happy when you receive a gift - no matter what it might be! Later, we played the "Wrapping Paper Game" to emphasize the lesson:
I wrapped a piece of candy for each of my kids... in about 15 layers of different wrapping paper! (This is a great way to use up those extra scraps!) As they unwrapped each layer, I had Molly AND Ben say "thank you!" and had Molly act excited about her pretend gift. At the end, they each got to enjoy some candy but the real gift is *hopefully* their smiles and thank you's as they open that classic sweater with one sleeve longer than the other from their great aunt that everyone can relate to!
Other variations of this game include wrapping up several different objects (in just one layer each). Objects should be plain things from around the house, or toys the child already has played with. It takes a real actor to be thankful for an old toothbrush or your own socks! Also, you could start with the one present in many layers - and toss it back and forth between two siblings or yourself and your child. Each player unwraps a layer on their turn and goes through the gracious thank you's and such.
A version you can play at parties with several kids is like musical chairs: wrap a prize in several layers of paper and pass it around the circle of friends while music plays. When the music stops, whoever is holding the present unwraps one layer. Play continues until all the layers have been revealed and the final person to unwrap the prize gets to keep it. If you have enough time, that person should be out and then you start another round with a new present until each player gets a prize! Just stock up on that tape!!
In the past, Molly happily crumpled and ripped the paper, hiding under it and stepping on it.... much like Ben (1) is doing as my other little helper this year! Ben's addition to the tasks however is pulling out lots and lots of tape!
After we finished wrapping, we talked about how you're supposed to say thank you and act gracious and happy when you receive a gift - no matter what it might be! Later, we played the "Wrapping Paper Game" to emphasize the lesson:
I wrapped a piece of candy for each of my kids... in about 15 layers of different wrapping paper! (This is a great way to use up those extra scraps!) As they unwrapped each layer, I had Molly AND Ben say "thank you!" and had Molly act excited about her pretend gift. At the end, they each got to enjoy some candy but the real gift is *hopefully* their smiles and thank you's as they open that classic sweater with one sleeve longer than the other from their great aunt that everyone can relate to!
Other variations of this game include wrapping up several different objects (in just one layer each). Objects should be plain things from around the house, or toys the child already has played with. It takes a real actor to be thankful for an old toothbrush or your own socks! Also, you could start with the one present in many layers - and toss it back and forth between two siblings or yourself and your child. Each player unwraps a layer on their turn and goes through the gracious thank you's and such.A version you can play at parties with several kids is like musical chairs: wrap a prize in several layers of paper and pass it around the circle of friends while music plays. When the music stops, whoever is holding the present unwraps one layer. Play continues until all the layers have been revealed and the final person to unwrap the prize gets to keep it. If you have enough time, that person should be out and then you start another round with a new present until each player gets a prize! Just stock up on that tape!!
Tuesday, December 6, 2011
Christmas Card Ball Ornaments
Here is one of my very favorite projects ever!! I originally read about these in a special issue Martha Stuart Holiday Handmade Gifts Magazine from 2006. These make great gifts, great decorations, and they're a great way to re-purpose your old Christmas cards!
Start by cutting circles out of old Christmas cards, about 1 1/4 inch in diameter. I actually have a large hole punch so it was pretty quick work, but in the past I've cut them out by hand and it's not so bad! You can also make really big ones by tracing around a glass to make your circles. Each ornament has 20 sides so you'll need 20 circles. That equals about two cards, unless you really mix it up and use lots of different designs.
Next, use your scissors to score an equilateral triangle into the back of each circle, with corners touching along the circumference. Fold the edges up on the front.

Now you're ready to build the ball! Start by gluing two circles together, points touching. Glue a total of five like this to create to the top - all tips touching in the center point like a star. Then glue five more together that will be the bottom. Just use regular glue but you'll need to hold each connection for a few seconds to be sure it stays put!
Next, glue 10 more circles together - side to side - with the tips alternating up and down. Connect them like a ring because this will be the middle.
Finally, glue your top and bottom to the middle. You can use a needle and thread to make a loop in it for hanging... or use a hole punch and add ribbon or yarn. I actually don't have a regular size hold punch. What's up with that??
Anyway, when when your Christmas Card Ornaments are dry, they will be so sturdy and last for years! You can hang them on your tree, tie them onto wrapped gifts, toss them around with your kids, or display several of them in a large vase or bowl. Try making themed ones by cutting out circles from only cards with trees or snowmen... or coordinate colors... or just use colored card stock if you want! I love these!
Start by cutting circles out of old Christmas cards, about 1 1/4 inch in diameter. I actually have a large hole punch so it was pretty quick work, but in the past I've cut them out by hand and it's not so bad! You can also make really big ones by tracing around a glass to make your circles. Each ornament has 20 sides so you'll need 20 circles. That equals about two cards, unless you really mix it up and use lots of different designs.Next, use your scissors to score an equilateral triangle into the back of each circle, with corners touching along the circumference. Fold the edges up on the front.

Now you're ready to build the ball! Start by gluing two circles together, points touching. Glue a total of five like this to create to the top - all tips touching in the center point like a star. Then glue five more together that will be the bottom. Just use regular glue but you'll need to hold each connection for a few seconds to be sure it stays put!
Next, glue 10 more circles together - side to side - with the tips alternating up and down. Connect them like a ring because this will be the middle.
Finally, glue your top and bottom to the middle. You can use a needle and thread to make a loop in it for hanging... or use a hole punch and add ribbon or yarn. I actually don't have a regular size hold punch. What's up with that??
Anyway, when when your Christmas Card Ornaments are dry, they will be so sturdy and last for years! You can hang them on your tree, tie them onto wrapped gifts, toss them around with your kids, or display several of them in a large vase or bowl. Try making themed ones by cutting out circles from only cards with trees or snowmen... or coordinate colors... or just use colored card stock if you want! I love these!
Monday, December 5, 2011
Paper and Felt Stocking Craft
Today our calendar said to make a stocking! Ben (1) got to decorate one I cut out of construction paper. He used washable markers and stickers. Then he colored on the stickers! I taped a piece of tinsel along the top for extra pizazz.

Molly (4) got to "sew" her own stocking. I bought a kit from Target for $2 but you can make your own with two sheets of felt and some yarn. I knotted one end for her so it wouldn't pull through and she stitched it all the way around! I wrapped the end of her yarn with some tape so it wouldn't unravel as she sewed. Then I let her decorate it with fabric markers and she glued on some cotton balls. She even drew Santa and his sleigh and glued on a piece of cotton ball for Santa's beard!

Molly (4) got to "sew" her own stocking. I bought a kit from Target for $2 but you can make your own with two sheets of felt and some yarn. I knotted one end for her so it wouldn't pull through and she stitched it all the way around! I wrapped the end of her yarn with some tape so it wouldn't unravel as she sewed. Then I let her decorate it with fabric markers and she glued on some cotton balls. She even drew Santa and his sleigh and glued on a piece of cotton ball for Santa's beard!
Sunday, December 4, 2011
Collage Letter to Santa
Writing a letter to Santa is a big deal... but what if your kids can't write yet? I had Molly (4) look through several catalogs and cut out pictures of what she wanted. She also cut out pictures of toys she thought her little brother, Ben (1), would like too! Then she used a glue stick to create a collage of her list. I also had her draw a picture of some things she wanted for Santa and I was so delighted to see she drew an ornament with a picture of herself on it... so Santa will bring me one! Luckily I've already ordered one from Walmart.com/photo so she won't be disappointed. Meanwhile, Ben (1) drew a wonderful picture with green and red washable markers!


Saturday, December 3, 2011
Cupcake Wrapper Holiday Wreath
I can't believe it's already into December already!! We have our Christmas Countdown Calendar up - my mom made it for me a long time ago and it's one of my favorite traditions from my childhood! Each day has a different activity to do - some days have something specific like the 19th when we'll go see the Nutcracker (!!!) and some days have open-ended ideas like make a special craft or open a small gift. Some of my favorites every year are to drive around looking at Christmas lights and of course to visit Santa.

Meanwhile... one project we've made so far is a Cupcake Wrapper Wreath!! This was a project I found in the November 2010 issue of Family Fun Magazine and I've been waiting to make one. Here's what you'll need:
Paper Plate
Cupcake Wrappers
Mini Cupcake Wrappers or Construction Paper
Ribbon
Scissors
Glue
First, cut out a circle from your paper plate. I just folded it in half and cut out a half circle to make it easy. We flattened out some green cupcake wrappers and Molly (4) glued them around the paper plate ring, overlapping them so no white showed through. The magazine used those silver foil ones so that would look cool too! Next, glue on some red flowers. You can make some out of mini cupcake wrappers, by folding them into thirds and cutting a triangle into the outer edge - when you unfold it you have a pointy flower! I actually have a really cool electric cutter so I used that to cut some flowers and circles (and "Joy") for Molly to glue on. Even before it was dry I taped on a loop of ribbon to the back and we hung it up right away!

This was fun, EASY, and festive! You can make one in colors for any holiday too so
it's not just for Christmas.

Meanwhile... one project we've made so far is a Cupcake Wrapper Wreath!! This was a project I found in the November 2010 issue of Family Fun Magazine and I've been waiting to make one. Here's what you'll need:
Paper Plate
Cupcake Wrappers
Mini Cupcake Wrappers or Construction Paper
Ribbon
Scissors
Glue
First, cut out a circle from your paper plate. I just folded it in half and cut out a half circle to make it easy. We flattened out some green cupcake wrappers and Molly (4) glued them around the paper plate ring, overlapping them so no white showed through. The magazine used those silver foil ones so that would look cool too! Next, glue on some red flowers. You can make some out of mini cupcake wrappers, by folding them into thirds and cutting a triangle into the outer edge - when you unfold it you have a pointy flower! I actually have a really cool electric cutter so I used that to cut some flowers and circles (and "Joy") for Molly to glue on. Even before it was dry I taped on a loop of ribbon to the back and we hung it up right away!

This was fun, EASY, and festive! You can make one in colors for any holiday too so
it's not just for Christmas.
Subscribe to:
Posts (Atom)