Summer Vacation is here and MOMS Camp 2014 has begun! MOMS Camp is something I came up with several years ago to make the most of my time with my kids during the summer. It stands for Make Our Moments Special. I've given each week over the summer a different theme. Throughout each week we'll explore that theme with activities, crafts, movies, books, and outings.
First off we have "Weather Week!"... complete with sunshine, clouds, rain, wind, storms, tornadoes, and ending with rainbows! We are focusing on the weather that we will be experiencing this time of year here in Kansas. This is the one time ALL SUMMER I'll be happy to see thunderstorms in the forecast! haha!
A list of books we will read this week are:
Cloudy With a Chance of Meatballs by Judi Barrett
Freddy The Frogcaster by Janice Dean
Clouds by Marion Dane Bauer
Little Cloud by Eric Carle
The Police Cloud by Christoph Niemann
In Like a Lion Out Like a Lamb by Marion Dane Bauer
Molly and the Storm by Christine Leeson
Stormy Weather by Debi Gliori
Extreme Weather: Tornadoes by Anne Wendorff
Over the Rainbow by Eric Puybaret
A Fairy Ballet by Daisy Meadows
Rainbow Magic: The Weather Fairies Set by Daisy Meadows
Elmer and the Rainbow by David McKee
DVD's I've checked out from the library for this week include:
Sid the Science Kid: Weather Kid Sid
Sid the Science Kid: What is a Rainbow?
Elmos's World: The Great Outdoors (includes an episode called Weather)
Sesame Street: Elmo's Rainbow and Other Spring Stories
Dora the Explorer: Shy Rainbow
Cloudy With A Chance of Meatballs (1 and 2!)
The Wizard of Oz
Tuesday, May 27, 2014
Friday, February 7, 2014
Hand Print Snowflake Project
I love making little projects with my kids' hand prints. It is such a fun way to remember how small their sweet hands are at this age! We got pretty crafty during a recent snow day home from school so I took the opportunity to make a project with some hand print snowflakes!
As always, I used Kids Washable Crayola Paint. I painted a mix of light and dark blue on one of their hands and made the prints on white construction paper. To make the snowflake, you'll need to do multiple prints, each a little off center from the one before. We did 6-8 prints for each snowflake. Reapply the paint after every two hand prints so it doesn't get too used up.
Before the paint was dry, I had my kids sprinkle glitter (yay!) on their snowflake. This kind of paint dries very quickly so you need to move fast. We used white glitter.
Meanwhile, I created a sign for our snowflakes on a sheet of 6x12 bright blue card stock. I used a silver metallic permanent marker to write "Our Little Snowflakes" and then added the year.
Once the snowflakes were dry, I cut them out and used a hold punch to add a hole at the top of each, as well as a hole for each on my sign. I used varying lengths of white yarn to attach my snowflakes to the sign. Here's how I made it look nice without any knots:
I threaded the yarn through as a loop into the snowflake hole.
Then I passed the two open ends of yarn through that loop and pulled tight. If your hole breaks, just reinforce it with clear tape and punch another hole through that.
Next I threaded both loose ends of my yarn UP through the hole in my sign. Wrap your two loose ends around the yarn connecting to the snowflake and tie a knot behind that.
Use tape to secure the knot to the back of your sign and pull tight.
This is such a cute decorate to have in my kitchen now - and it is one to save and pull out again each winter! I made one with my friend's children as a fun gift for her and we used blue paper as a background for our white and light blue painted hand prints.
Wednesday, February 5, 2014
Snow Day Fun - Indoor Carnival!
Being stuck inside on a snow day is no excuse for boredom! I decided to transform my whole house into an indoor carnival when my two kids were home from school on a very cold snow day. Each room had a couple different games in it and I acted as their ring master to guide them from game to game. As my kids watched tv, I set it all up and had it ready to play, but then my kids had a fun time coming up with their own games! My daughter even set up a prize stand in her room, assigning points to each item so it was a great bit of math practice when it was time to cash in our prizes!
Here are a few of the games I came up with:
I used Washable Crayola markers to draw a huge target on our living room windows and had the kids shoot their dart guns at it.
We bounced plastic buttons into a display of plastic trays... from the Dollar Spot at Target! Score!
Just timing each other while we did a simple puzzle was really fun.
Here's my favorite one: a water shooting gallery!! I drew several circles across the back of my bathtub using Washable Crayola markers. Then the kids stood next to the tub and shot at the dots with water guns! The only thing to get wet was my bathtub, and as they kept shooting, the colored dots disappeared! We actually re-did this game a few times because it was such a big hit!
Here's a giant ring toss consisting of a hula hoop and a skinny little shelf I had in our family room. You just need something sturdy enough that it won't fall over when the ring hits it! Even a person sitting down will work - we did it that way too. ;O)
We tossed a small basketball into a large basket in our hallway...
... and I set up a bean bag toss using a few bowls from our kitchen. Check out a Valentine's Day version I made HERE that shows how to make homemade bean bags!
We did have a few other simple games, and then my kids' games they made up got a little silly, but it was definitely a fun and different way to spend some time at home on a snow day! Plus we got prizes! Have fun!
Here are a few of the games I came up with:
I used Washable Crayola markers to draw a huge target on our living room windows and had the kids shoot their dart guns at it.
We bounced plastic buttons into a display of plastic trays... from the Dollar Spot at Target! Score!
Just timing each other while we did a simple puzzle was really fun.
Here's my favorite one: a water shooting gallery!! I drew several circles across the back of my bathtub using Washable Crayola markers. Then the kids stood next to the tub and shot at the dots with water guns! The only thing to get wet was my bathtub, and as they kept shooting, the colored dots disappeared! We actually re-did this game a few times because it was such a big hit!
Here's a giant ring toss consisting of a hula hoop and a skinny little shelf I had in our family room. You just need something sturdy enough that it won't fall over when the ring hits it! Even a person sitting down will work - we did it that way too. ;O)
We tossed a small basketball into a large basket in our hallway...
... and I set up a bean bag toss using a few bowls from our kitchen. Check out a Valentine's Day version I made HERE that shows how to make homemade bean bags!
We did have a few other simple games, and then my kids' games they made up got a little silly, but it was definitely a fun and different way to spend some time at home on a snow day! Plus we got prizes! Have fun!
Friday, September 20, 2013
9 Fun Ways To Practice Spelling Words
My daughter is in the first grade this year and already has a weekly spelling test! I can't believe how difficult the words have gotten after just a couple of weeks! We try to practice the words daily, but simply having her write them down is pretty boring. Here are several fun ideas I came up with to help her practice. Now my daughter feels like she's actually having fun and playing when she's really studying! I'm so proud to report she hasn't scored lower than 100% on a spelling test yet!
1. Glitter!
I filled a flat, rectangular plastic container with glitter and let my daughter write her letters in it. Glitter is so much prettier than sand and you can choose any color! It only took a couple ounces of glitter to fill the bottom - you don't need very much. We use the bottom tip of a permanent marker as our writing utensil.
3. Painting With Water!
We used our Aquadoodle mat to paint out her spelling words one day, but you can also paint with water on regular paper... or your driveway, or a concrete wall, or your garage door! Just use a regular paint brush and plain water.
4. Play Doh!
Use a set of letter cookie cutters to spell words in Play Doh. I got my letters as part of a set of 100 cookie cutter from Wal-Mart for cheap! You can create each individual word, or make lots of letters and use them to spell words on a separate sheet of paper.
5. Make A Spelling "Puzzle"!
I love these little foam puzzles and so do my kids! You can buy them at the Dollar Tree for...what else? A dollar. They come in a set of 9 and are all interlocking. My kids love to build shapes and roads with them. NOW we spell words with them, too! Use a permanent marker to write letters on the backs. I made lower case letters this time and added an underline to avoid confusion.
6. Spell With Sticks!
Write letters on the end of craft sticks and have your child use them to spell out words. We tuck our sticks into our count down calendar because it has great pockets. You can also just lay your sticks out on the table, or poke them into another pocket such as an apron. OR stick them into a clump of Play Doh so they'll stick up!
7. Find The Letter!
Here is a chart I made out of a 12" x 12" sheet of card stock. Write the whole alphabet on it, in large letters. Now cut off the end of a toilet paper or paper towel tube. Have your child use this to circle each letter in the word they're spelling! This feels a little reminiscent of a Ouija Board, but there's nothing scary about passing that spelling test!
8. Play School!
My daughter loves to play school, especially when I'm the student and she gets to be the teacher! One tactic I use is to raise my hand and ask her how to spell a word. Of course it happens to be on her spelling list! She loves writing on her chalkboard and she really loves "teaching" me!
9. Tablet!
This last idea is so simple but I felt like a genius when I thought of it. Have your child practice writing their spelling words on a Magna Doodle type board or even a tablet. It's easy to erase when they mess up or are ready for the next word. It still feels like playing because it's not a plain piece of paper and a pencil... and you can grab it on the go without having a hard surface to write on or worry about losing a pencil in bed, on the couch, in the car... or where ever!
1. Glitter!
I filled a flat, rectangular plastic container with glitter and let my daughter write her letters in it. Glitter is so much prettier than sand and you can choose any color! It only took a couple ounces of glitter to fill the bottom - you don't need very much. We use the bottom tip of a permanent marker as our writing utensil.
2. Cup Stacking!
Get an inexpensive package of plastic cups and write large letters on them with permanent markers. I went through my daughter's weekly list of words to determine which letters I for sure need, and if I need any doubles. Now have your child stack the letters and spell their words! For added fun, let them knock down their spelling tower after each correct word. Click HERE for instructions on how to make your own bean bags!
We used our Aquadoodle mat to paint out her spelling words one day, but you can also paint with water on regular paper... or your driveway, or a concrete wall, or your garage door! Just use a regular paint brush and plain water.
4. Play Doh!
Use a set of letter cookie cutters to spell words in Play Doh. I got my letters as part of a set of 100 cookie cutter from Wal-Mart for cheap! You can create each individual word, or make lots of letters and use them to spell words on a separate sheet of paper.
5. Make A Spelling "Puzzle"!
I love these little foam puzzles and so do my kids! You can buy them at the Dollar Tree for...what else? A dollar. They come in a set of 9 and are all interlocking. My kids love to build shapes and roads with them. NOW we spell words with them, too! Use a permanent marker to write letters on the backs. I made lower case letters this time and added an underline to avoid confusion.
6. Spell With Sticks!
Write letters on the end of craft sticks and have your child use them to spell out words. We tuck our sticks into our count down calendar because it has great pockets. You can also just lay your sticks out on the table, or poke them into another pocket such as an apron. OR stick them into a clump of Play Doh so they'll stick up!
7. Find The Letter!
Here is a chart I made out of a 12" x 12" sheet of card stock. Write the whole alphabet on it, in large letters. Now cut off the end of a toilet paper or paper towel tube. Have your child use this to circle each letter in the word they're spelling! This feels a little reminiscent of a Ouija Board, but there's nothing scary about passing that spelling test!
8. Play School!
My daughter loves to play school, especially when I'm the student and she gets to be the teacher! One tactic I use is to raise my hand and ask her how to spell a word. Of course it happens to be on her spelling list! She loves writing on her chalkboard and she really loves "teaching" me!
9. Tablet!
This last idea is so simple but I felt like a genius when I thought of it. Have your child practice writing their spelling words on a Magna Doodle type board or even a tablet. It's easy to erase when they mess up or are ready for the next word. It still feels like playing because it's not a plain piece of paper and a pencil... and you can grab it on the go without having a hard surface to write on or worry about losing a pencil in bed, on the couch, in the car... or where ever!
Monday, September 2, 2013
Octopus Theme Party Ideas - Food
**This blog talks about the food I served at my son's Octopus Theme Party. Check out my other blogs to read about the PARTY FAVORS and GAMES.
I decided to serve a simple lunch for my son's summer party because I knew the kids (and moms) would be hungry after swimming!
After scavenging Pinterest for ideas, I settled on a few common choices.
Octo-dogs: a hot dog cooked, then cut to look like an octopus. You see these everywhere!! To make it easier, I cooked them and cut them ahead of time (over the stove on a frying pan in a bit of bacon grease). I also cooked several regular hot dogs and placed them in buns. Then I wrapped each hot dog in foil and placed them on a cookie sheet in the oven set at 140 degrees. They stayed warm until we were ready to eat and didn't dry out! *octo-dog in photo is not a cooked one per one little boy's request...
Octopus Bananas!
Octopus dip: this was really clever! Start with an orange pepper and cut off the bottom. Turn it upside down and draw on a face. I just used permanent marker because we didn't plan on eating this part. Then cut 8 strips of pepper to create the tentacles. Set all this up in a bowl of dip to look like your octopus is swimming in the dip! Use extra strips of the pepper and crackers for dipping.
Octopus cake: I baked a small, single-layer cake for this one and covered it with homemade blue frosting. Click HERE for my frosting recipe. I used plenty of frosting and used a swirling motion to make it look like waves. Finally, I created small gummy octopuses on top by using a Dots candy for each body, and small gummy worms cut in half for the tentacles. I made just enough candy octopuses for each guest so everyone got one.
I decided to serve a simple lunch for my son's summer party because I knew the kids (and moms) would be hungry after swimming!
After scavenging Pinterest for ideas, I settled on a few common choices.
Octo-dogs: a hot dog cooked, then cut to look like an octopus. You see these everywhere!! To make it easier, I cooked them and cut them ahead of time (over the stove on a frying pan in a bit of bacon grease). I also cooked several regular hot dogs and placed them in buns. Then I wrapped each hot dog in foil and placed them on a cookie sheet in the oven set at 140 degrees. They stayed warm until we were ready to eat and didn't dry out! *octo-dog in photo is not a cooked one per one little boy's request...
Octopus Bananas!
Octopus dip: this was really clever! Start with an orange pepper and cut off the bottom. Turn it upside down and draw on a face. I just used permanent marker because we didn't plan on eating this part. Then cut 8 strips of pepper to create the tentacles. Set all this up in a bowl of dip to look like your octopus is swimming in the dip! Use extra strips of the pepper and crackers for dipping.
Octopus cake: I baked a small, single-layer cake for this one and covered it with homemade blue frosting. Click HERE for my frosting recipe. I used plenty of frosting and used a swirling motion to make it look like waves. Finally, I created small gummy octopuses on top by using a Dots candy for each body, and small gummy worms cut in half for the tentacles. I made just enough candy octopuses for each guest so everyone got one.
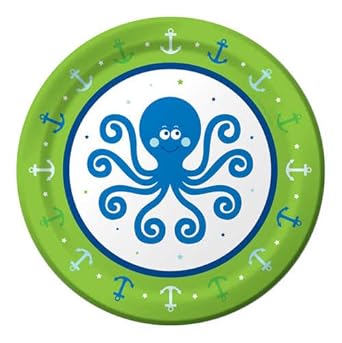
Finally, here's the cute octopus plates I found on Amazon!
Octopus Theme Party Ideas - Favors
*This blog talks about some party favors for our Octopus Theme Party. Check out my other blogs to read about the GAMES and FOOD
I always love to send the kids home from a party with fun favors but I'm not a fan of the typical tiny erasers and cheap plastic toys that will just end up in the trash. Not to mention our guests were pretty young and those ideas posed a choking hazard!! Here's what I came up with:
Octopus Suckers: I used colorful pipe cleaners to create octopus suckers out of Tootsie Pops. Here are step by step photo instructions:
Octopus Balloon Animals: ever since I took my kids to a free outdoor concert over the summer, they have been obsessed with the balloon animals they got there! I bought an inexpensive set at Walmart for just $5 that included 20 long balloons and a pump. The pump is most important!! Those balloons were pretty tight and kept popping so I ordered a larger bag of 100 professional balloons from Amazon. You can find them HERE.
I found a video online that gave instructions on how to create your own octopus balloon animals. It really wasn't that hard and it was a fun gift to pass out! They also made fun decorations before the kids went home! Here is the video I used!
Finally, here's some octopus party blow outs I found on Amazon:
I always love to send the kids home from a party with fun favors but I'm not a fan of the typical tiny erasers and cheap plastic toys that will just end up in the trash. Not to mention our guests were pretty young and those ideas posed a choking hazard!! Here's what I came up with:
Octopus Suckers: I used colorful pipe cleaners to create octopus suckers out of Tootsie Pops. Here are step by step photo instructions:
Octopus Balloon Animals: ever since I took my kids to a free outdoor concert over the summer, they have been obsessed with the balloon animals they got there! I bought an inexpensive set at Walmart for just $5 that included 20 long balloons and a pump. The pump is most important!! Those balloons were pretty tight and kept popping so I ordered a larger bag of 100 professional balloons from Amazon. You can find them HERE.
I found a video online that gave instructions on how to create your own octopus balloon animals. It really wasn't that hard and it was a fun gift to pass out! They also made fun decorations before the kids went home! Here is the video I used!
Finally, here's some octopus party blow outs I found on Amazon:
Octopus Theme Party Ideas - Party Games
Ever since my daughter was born in 2007, I have given her a Halloween Party every year just for fun (even when she was only 6 months old!!). When my son was born in 2010, I wanted to give him a part each year for fun, too, but couldn't decide on a holiday to celebrate so he gets a summer party each year! I admit it's usually been an "end of summer" party because I always get so busy with our other happenings that I don't get around to planning it until school is upon us!!
This year, my son chose the theme of Octopuses for his party! Once you pick a theme for any gathering, planning the details just falls into place.
This blog features the games I came up with for our party. Check out the other two parts to read about the FOOD and PARTY FAVORS!
Ocean Animals Search: I found a package of small plastic ocean animals which included one octopus at a huge toy store near us called US Toy. While the kids were playing in a separate room, I hid all twelve sea dwellers around my living room. This was a group of children ranging in age 2 1/2 to 3 1/2 so the hiding spots weren't too difficult! I had the kids come in the room to search for the animals. Whoever found the octopus was the winner!
Ink the Octopus: A couple days before the party, I drew a large octopus on my garage doors using sidewalk chalk. This was a really fun set up activity to do with my son because he got to participate with me! When all our guests arrived, this was also a great back drop for a group photo!! Also before the party, I spent about an hour filling up water balloons so they would be all ready for the big day. I filled up a large cooler (on wheels) with about 200 water balloons. I had the kids throw the balloons at the octopus drawing to make him "disappear!"
This year, my son chose the theme of Octopuses for his party! Once you pick a theme for any gathering, planning the details just falls into place.
This blog features the games I came up with for our party. Check out the other two parts to read about the FOOD and PARTY FAVORS!
Ocean Animals Search: I found a package of small plastic ocean animals which included one octopus at a huge toy store near us called US Toy. While the kids were playing in a separate room, I hid all twelve sea dwellers around my living room. This was a group of children ranging in age 2 1/2 to 3 1/2 so the hiding spots weren't too difficult! I had the kids come in the room to search for the animals. Whoever found the octopus was the winner!
Ink the Octopus: A couple days before the party, I drew a large octopus on my garage doors using sidewalk chalk. This was a really fun set up activity to do with my son because he got to participate with me! When all our guests arrived, this was also a great back drop for a group photo!! Also before the party, I spent about an hour filling up water balloons so they would be all ready for the big day. I filled up a large cooler (on wheels) with about 200 water balloons. I had the kids throw the balloons at the octopus drawing to make him "disappear!"
Subscribe to:
Posts (Atom)