Friday, September 20, 2013

9 Fun Ways To Practice Spelling Words

My daughter is in the first grade this year and already has a weekly spelling test! I can't believe how difficult the words have gotten after just a couple of weeks! We try to practice the words daily, but simply having her write them down is pretty boring. Here are several fun ideas I came up with to help her practice.  Now my daughter feels like she's actually having fun and playing when she's really studying! I'm so proud to report she hasn't scored lower than 100% on a spelling test yet!

1. Glitter!

I filled a flat, rectangular plastic container with glitter and let my daughter write her letters in it. Glitter is so much prettier than sand and you can choose any color! It only took a couple ounces of glitter to fill the bottom - you don't need very much. We use the bottom tip of a permanent marker as our writing utensil. 


2. Cup Stacking!

Get an inexpensive package of plastic cups and write large letters on them with permanent markers. I went through my daughter's weekly list of words to determine which letters I for sure need, and if I need any doubles. Now have your child stack the letters and spell their words! For added fun, let them knock down their spelling tower after each correct word. Click HERE for instructions on how to make your own bean bags!


3. Painting With Water!

We used our Aquadoodle mat to paint out her spelling words one day, but you can also paint with water on regular paper... or your driveway, or a concrete wall, or your garage door! Just use a regular paint brush and plain water.


4. Play Doh!

Use a set of letter cookie cutters to spell words in Play Doh. I got my letters as part of a set of 100 cookie cutter from Wal-Mart for cheap! You can create each individual word, or make lots of letters and use them to spell words on a separate sheet of paper.


5. Make A Spelling "Puzzle"!

I love these little foam puzzles and so do my kids! You can buy them at the Dollar Tree for...what else? A dollar. They come in a set of 9 and are all interlocking. My kids love to build shapes and roads with them. NOW we spell words with them, too! Use a permanent marker to write letters on the backs. I made lower case letters this time and added an underline to avoid confusion. 


6.  Spell With Sticks!

Write letters on the end of craft sticks and have your child use them to spell out words. We tuck our sticks into our count down calendar because it has great pockets. You can also just lay your sticks out on the table, or poke them into another pocket such as an apron. OR stick them into a clump of Play Doh so they'll stick up!


7.  Find The Letter!

Here is a chart I made out of a 12" x 12" sheet of card stock.  Write the whole alphabet on it, in large letters.  Now cut off the end of a toilet paper or paper towel tube.  Have your child use this to circle each letter in the word they're spelling! This feels a little reminiscent of a Ouija Board, but there's nothing scary about passing that spelling test!


8. Play School!

My daughter loves to play school, especially when I'm the student and she gets to be the teacher! One tactic I use is to raise my hand and ask her how to spell a word. Of course it happens to be on her spelling list! She loves writing on her chalkboard and she really loves "teaching" me!


9. Tablet!

This last idea is so simple but I felt like a genius when I thought of it. Have your child practice writing their spelling words on a Magna Doodle type board or even a tablet. It's easy to erase when they mess up or are ready for the next word. It still feels like playing because it's not a plain piece of paper and a pencil... and you can grab it on the go without having a hard surface to write on or worry about losing a pencil in bed, on the couch, in the car... or where ever!


Monday, September 2, 2013

Octopus Theme Party Ideas - Food

**This blog talks about the food I served at my son's Octopus Theme Party. Check out my other blogs to read about the PARTY FAVORS and GAMES.

I decided to serve a simple lunch for my son's summer party because I knew the kids (and moms) would be hungry after swimming!

After scavenging Pinterest for ideas, I settled on a few common choices.

Octo-dogs: a hot dog cooked, then cut to look like an octopus. You see these everywhere!! To make it easier, I cooked them and cut them ahead of time (over the stove on a frying pan in a bit of bacon grease). I also cooked several regular hot dogs and placed them in buns. Then I wrapped each hot dog in foil and placed them on a cookie sheet in the oven set at 140 degrees. They stayed warm until we were ready to eat and didn't dry out! *octo-dog in photo is not a cooked one per one little boy's request...


Octopus Bananas!


Octopus dip: this was really clever! Start with an orange pepper and cut off the bottom. Turn it upside down and draw on a face. I just used permanent marker because we didn't plan on eating this part. Then cut 8 strips of pepper to create the tentacles. Set all this up in a bowl of dip to look like your octopus is swimming in the dip! Use extra strips of the pepper and crackers for dipping.


Octopus cake: I baked a small, single-layer cake for this one and covered it with homemade blue frosting. Click HERE for my frosting recipe. I used plenty of frosting and used a swirling motion to make it look like waves.  Finally, I created small gummy octopuses on top by using a Dots candy for each body, and small gummy worms cut in half for the tentacles.  I made just enough candy octopuses for each guest so everyone got one.


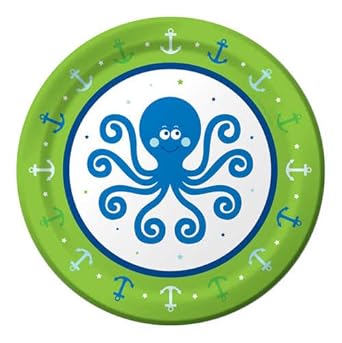
Finally, here's the cute octopus plates I found on Amazon!


Octopus Theme Party Ideas - Favors

*This blog talks about some party favors for our Octopus Theme Party. Check out my other blogs to read about the GAMES  and FOOD

I always love to send the kids home from a party with fun favors but I'm not a fan of the typical tiny erasers and cheap plastic toys that will just end up in the trash.  Not to mention our guests were pretty young and those ideas posed a choking hazard!! Here's what I came up with:

Octopus Suckers: I used colorful pipe cleaners to create octopus suckers out of Tootsie Pops. Here are step by step photo instructions:


Octopus Balloon Animals: ever since I took my kids to a free outdoor concert over the summer, they have been obsessed with the balloon animals they got there! I bought an inexpensive set at Walmart for just $5 that included 20 long balloons and a pump. The pump is most important!! Those balloons were pretty tight and kept popping so I ordered a larger bag of 100 professional balloons from Amazon. You can find them HERE.


I found a video online that gave instructions on how to create your own octopus balloon animals. It really wasn't that hard and it was a fun gift to pass out! They also made fun decorations before the kids went home! Here is the video I used! 

Finally, here's  some octopus party blow outs I found on Amazon:


Octopus Theme Party Ideas - Party Games

Ever since my daughter was born in 2007, I have given her a Halloween Party every year just for fun (even when she was only 6 months old!!). When my son was born in 2010, I wanted to give him a part each year for fun, too, but couldn't decide on a holiday to celebrate so he gets a summer party each year! I admit it's usually been an "end of summer" party because I always get so busy with our other happenings that I don't get around to planning it until school is upon us!!

This year, my son chose the theme of Octopuses for his party! Once you pick a theme for any gathering, planning the details just falls into place.

This blog features the games I came up with for our party.  Check out the other two parts to read about the FOOD and PARTY FAVORS!

Ocean Animals Search: I found a package of small plastic ocean animals which included one octopus at a huge toy store near us called US Toy. While the kids were playing in a separate room, I hid all twelve sea dwellers around my living room. This was a group of children ranging in age 2 1/2 to 3 1/2 so the hiding spots weren't too difficult! I had the kids come in the room to search for the animals. Whoever found the octopus was the winner!


Ink the Octopus: A couple days before the party, I drew a large octopus on my garage doors using sidewalk chalk. This was a really fun set up activity to do with my son because he got to participate with me! When all our guests arrived, this was also a great back drop for a group photo!! Also before the party, I spent about an hour filling up water balloons so they would be all ready for the big day. I filled up a large cooler (on wheels) with about 200 water balloons. I had the kids throw the balloons at the octopus drawing to make him "disappear!"


Monday, July 15, 2013

Cave Drawings

One of our favorite parts of Cave Week was learning about cave drawings!! We read a cute book about "Grunt! The Primitive Cave Boy" by Timothy Bush.  In it a boy draws animals on his cave walls and they come to life. Then we decided to create our own cave drawings!

I used two huge sheets of brown packing paper to tape on our own "cave" walls (a corner in the living room we covered with blankets). I had been saving that packing paper for months! It originally came in a package I'd ordered from Amazon and I knew it would come in handy!


We decorated our cave walls using crayons.  Each of us got to do a different section. To find some real examples of cave drawings we could replicate, we took to the internet to find pictures of real examples of cave paintings. Here are the links to the ones we really liked:


One

Two

Three


This was such a fun project because it involved learning, a creative project, and imaginative play! Molly (6) loved finding real examples of cave drawings and discussing what each image stood for or what story it would tell.  As for the actual drawing part? My kids ventured in their cave to keep adding to it all week! Finally, both of them had a blast pretending to be cave men.... or even explorers discovering the drawings we'd done and speculating about the cave men who lived there. Weeks later our cave drawings are still up!


Wednesday, July 3, 2013

Oil Pastels Firework Project for Kids

When I was a kid I loved drawing with oil pastels so I bought some recently for my own daughter, now 6. I have been waiting for a special project to get them out and came across a neat one on Pinterest. We had so much fun doing this "big kid craft" together during her little brother's nap one day. I can't find the original blog this is based off of, but here's my version:


Start with a sheet of white paper and draw several fireworks using the pastels (love them!). My daughter chose to use all patriotic colors but I went kind of wild. Start by drawing a circle, making sure it's pretty thick. Add a second and third circle around that one using different colors. 


Now use your finger to smear it out from the center outwards.


My daughter wasn't a fan of this process but I thought it looked cool. I used Crayola brand oil pastels and my fingers washed off really easily afterward.


Now draw several lines from the center out. You can use different colors and different lengths to make it look like a real exploding firework.


Once you've drawn several fireworks, it's time to create the night sky! Use water colors and fill in the whole sheet. The oil based pastels will show right through! We used black, blue, and purple water colors with plenty of water. Before the whole thing is dry, sprinkle on some glitter just because. :O)


If you wanted to skip the paint part, just make your oil pastel fireworks on a sheet of black construction paper instead of white. I love how these look and it was so fun sitting next to my little girl creating them because it was a two step process and made for some great quality time! Happy Fourth of July!!


Uncle Sam Paper Plate Mask

Here is a fun and simple project to make with your kids for the Fourth of July! You probably have everything you need already around your house.

UNCLE SAM PAPER PLATE MASK!


My 3 year old was able to do it mostly by himself with some prep work by me. My daughter, age 6, also had fun making one! Her favorite part was coloring the hat. Here's what you'll need:

- paper plate
- white card stock or construction paper
- scissors
- glue
- crayons
- cotton balls
- craft stick
- stapler plus tape

Start by cutting out the center of a paper plate. I did this part for both my kids. Then cut out a hat shape from your white card stock. Older children can cut this out on their own. Have your children decorate the hat with red and blue crayons.


Use glue to attach cotton balls to the bottom half of the paper plate. This is Uncle Sam's beard! I was so proud of my 3 year old during this part - he put the cotton balls in a perfect line and DIDN'T MAKE A MESS!! Woo hoo!!


Use an apricot colored crayon to fill in the blank white part of the paper plate. Now attach the hat to the top of your paper plate using a stapler. Be sure the smooth side of the staple is facing the back so it won't scratch your child's face.


Use strong tape (or a hot glue gun) to attach a craft stick to the back of your mask so you can hold it!


Tuesday, July 2, 2013

Fourth of July Pancakes

I wanted to make some special recipes for my kids since the Fourth of July is just around the corner.  After many searches on Pinterest, I thought I was destined to include strawberries and blueberries into EVERYTHING. That's fine and good but it got a little old. So I came up with something new: Firework Pancakes! They were so simple!!
 

I started with a regular recipe for pancake mix, but divided it into three separate bowls. I used about 7 drops of blue food coloring in one, then about 12 drops of red food coloring in another. I used more red so it didn't look so pink! Leave the biggest amount plain for white.


Set the burner a little lower than normal so you have some time to work with each pancake before it cooks! Start with a small circle of blue, then quickly surround it with a circle of red, and finally a circle of white.


I spread out the center using a chopstick. Make several lines from the inside out to create your firework.


Cook your pancake like normal. Note that only one side will have the firework design. I also made single red and blue and white ones so I could add chocolate chips. Yum!

What a fun breakfast for your kids! Aaaaand you can serve it with strawberries and blueberries if you wish it. ;O)


Sunday, June 23, 2013

Fun Cave Activities and Crafts for Kids

My theme for last week's MOMS Camp was all about CAVES! My kids are way into caves recently so I decided to make a whole week of activities based around them.  At first I felt kind of limited, but then I was surprised at how much I came up with and what a successful week it was!

Here is a list of fun activities and crafts we made during our cave week: 

- Naturally we made a giant cave in the living room out of blankets. We used an old baby gate (the kind that stands on it's own and makes a giant hexagon when linked together) to really add some space. It stayed up for a whole day and we had a blast laying in it to watch a movie; read books; and pretend to be bats, dinosaurs, bears, and even monsters. 

- Here is a fun and quick CRAFT we made that I found on Pinterest. You can make a mini cave out of a paper lunch sack. We used ours as a home for Molly's mini plastic dinosaurs, and later a tiny plush bear.

- We took TWO awesome trips this week!! First we went to the Omaha Zoo in Nebraska with my mom. We had visited before and knew all about their "Kingdom of the Night" exhibit, featuring bats and other cave-dwellers, as well as just nocturnal animals. That and a couple other exhibits featured areas that looked just like caves and the animals that lived in them! Seeing the bats - especially the Giant African Fruit Bat - was so amazing!


- Our second trip was to Fantastic Caverns in Springfield, MO.  It is the only ride-through cave in the U.S. so it was perfect for little feet that tire easily... and a little boy who is obsessed with trailers! Our tour guide was spectacular and the kids really loved being in a real cave. It was really neat to point out the different parts of the cave and formations that we had learned about from our books all week. My favorite part was when they turned of the lights and we got to be in absolute darkness: you literally couldn't see your hand in front of your face. According to our tour guide, if you stayed in absolute darkness for 30 days, you would go completely and permanently blind!! Luckily they turned the lights back on and our tour only lasted for about 50 minutes.


- We also acted out "We're Going On A Bear Hunt" which was really fun. I was happily surprised at how much my three year old really got into it! Here's what you do: sit on your knees and slap your legs gently with alternating hands to simulate walking as you chant/sing "We're going on a bear hunt/ We're gonna catch a big one/ We're not scared/ What a beautiful day!" Then you act like you come across something in your path: ie "Uh Oh! A river!" Then it's always the same: "We can't go over it. We can't go around it. Oh no! We'll have to go through it!" So then you pretend to swim and say something like "splashity splash! splashity splash! splashity splash!" .... so on and so on.. until you reach a cave and find a bear. He chases you and you have to QUICKLY go back through everything you passed again, doing the motions and sounds. Then you get home, slam the door, run upstairs, and hide under the covers. All while pretending and sitting on your knees. I remember playing this in preschool when I was little and was THRILLED to find a BOOK of it which we have read since Molly (age 6) was a baby. 


Saturday, June 22, 2013

Bath Time Foam Robots

I love finding ways to make bath time more fun for my kids! I read a while ago on Pinterest to use foam sheets to create a fun bath toy for your kids. I finally decided to make some for our Robot Week of MOMS Camp.

Start with a variety of colors of foam sheets. I found mine at Target in their kids' craft section for just a couple bucks. Cut out several shapes just like we did with the felt busy bags. Include regular shapes, as well as silly ones like long zig zags to be robot arms.

During your kid's bath time, get each foam piece a little wet and it will stick to the side of your tub! Now your child can create robot after robot! Note of warning: if you leave the pink ones stuck on overnight, it will stain your tub!! (oops) Don't fear! It does come off with a quick swipe of a wet cloth. ;O)  These are so fun for kids and curbs the complaining at bath time!!


You could also do the same thing in your kiddie pool in the yard!

Friday, June 14, 2013

Fathers Day Footprint Gift

Fathers Day is this weekend and I have put together another cute idea for my husband. I found the footprint idea on Pinterest a long time ago, but searched out a quote to pair with it to create a whole project.


First, start with the foot prints! I used a 12 x 12 sheet of card stock. You might have to print yours at an angle or use a larger piece if the dad's feet are too much bigger than my husband's! While he's away, grab one of his shoes and cover the bottom in paint. I used washable Crayola kids paint (like I do for everything!) Don't worry - it washes off so easily with water and will be dry before he gets home from work! Make an even print of the shoe... you might have to roll it around a little to get the toe, and press down at the arch to get the middle. I practiced with three different pairs of shoes to make sure I got the "coolest" print. Tennis shoes (aka sneakers) seem to work the best.

After that has dried - which shouldn't be more than 45 minutes, really - grab your largest child and make a footprint right on top of the shoe print. Try to line up the heels to get a good size comparison! Once that one is dry, do another right on top of it. Keep on going until you run out of kids. Be sure to use contrasting (but complimenting) colors so they all show up.

Meanwhile, I found a saying that I really liked and wrote it out on white construction paper. I just used a Sharpy marker and my regular hand writing but feel free to get all high tech and print it out instead. I never found a source for the quote, so it must just be one of those neat things passing along the internet.

I used a glue stick to attach the saying to card stock in coordinating colors, and used a paper cutter to get those straight edges.  Since it was card stock, I used Glue Dots (love them!) to attach the whole quote to my print.

"I don't want my kids to follow in my footsteps...
I want them to take the path next to me and go farther than I ever dreamt possible."

Happy Fathers Day!

Saturday, June 8, 2013

Robot Crafts and Printables

Here are few projects we did over the past few days for our robot themed week! I found all of these simple printouts on Pinterest.


We loved this robot helicopter! I printed one out for each of my kids (plus myself) to color with markers. After you cut it out and fold the legs in opposite directions, it's supposed to twirl down like a helicopter when you drop it. Ours didn't work as well as hoped, but when you weight down the head by adding two strips of scotch tape, it works much better! 


We decorated a cute robot key chain! We found ours sold individually at Michael's for less than a dollar apiece but I couldn't find a link for those online. The key chains in the link look the exact same, though! My 6 year old and I decorated ours with permanent markers. Mine had a cubed head so I drew a different facial expression on each side. This was great for emotion recognition practice for my three year old!


Here's a fun robot coloring page.
Here's another.

These pages are educational and fun! Here's a cute robot activity.
Here's another.

Hope this keeps you busy for a while!!